
Loading...
Loading...
Loading...
Loading...
Loading...
Loading...
Loading...
Loading...
Loading...
Loading...
Loading...
Loading...
Loading...
Loading...
Loading...
Loading...
Loading...
Loading...
Loading...
Loading...
Loading...
Loading...
Loading...
Loading...
Loading...
Loading...
Loading...
Loading...
Loading...
Loading...
Loading...
Loading...
Loading...
Loading...
Loading...
Loading...
Loading...
Loading...
Loading...
Loading...
Loading...
Loading...
Loading...
Loading...
Loading...
Loading...
Loading...
Loading...
Loading...
Loading...
Loading...
Loading...
Loading...
Loading...
Loading...
Loading...
Loading...
Loading...
Loading...
Loading...
Loading...
Loading...
Loading...
Loading...
Loading...
Loading...
Loading...
Loading...
Loading...
Loading...
The is an attendant console endpoint for Microsoft Teams that allows efficient call handling for receptionist users.
Is a Microsoft Partner with experience deploying Microsoft call handling & routing solutions in over 60 countries.
The landing page for this product is
Support Portal: Talk to Sales:
App Service Data Handling, Security, Compliance, Privacy & Identity Information.
See
After selecting a contact in either the search or contact groups, the contact information will appear in this panel. Alternatively, you can click on or hover over most avatars and the contact card will appear as a popup. There are three tabs in this panel: Details, Schedule (Exchange Calendar), and Organization Structure.
The Contact Details tab displays the selected contact's Teams status message, department, mobile number, time zone, and other relevant information.
Contact notes for internal contacts and PSTN numbers can be saved and viewed for the contact on the details tab. See Notes
The selected contact's calendar appointments will appear on this tab. Appointments for the next five business days will appear on the list.
The selected contact's organization structure will appear on this tab. Heading like Manager, Shares same manager, and Direct Reports can be expanded to show the relevant contact information.
USB audio device call control buttons allows the attendant console user to answer, disconnect, mute/unmute, and change volume by using the buttons on the audio device. The button locations may vary by model. Please refer to manufacturer documentation.
Requirements:
Jabra USB Audio Device (No other brands are supported at this time)
In the Teams desktop client, open settings | Devices | Disable Sync device buttons
1. Select the Devices Tab
Web browser only: Select Find and pair headsets | Select the headset on the browser notification | Connect
3. Select the Jabra device under Utilize headset buttons
4. Restart or refresh Attendant Console
Contacts can be searched by entering a search term in the search field at the top center of Landis Attendant Console. The search results will be shown as on the contact search panel.
Additional search fields can be specified by selecting the filter button to the right of the search field. A panel will appear below the search field with multiple fields. Text can be entered in any of the fields and select apply.
The filter button will show a * when a filter is being applied.
To remove the search filter, select the filter button and select Clear.
Prerequisite:
The user's personal Teams voicemails will appear in the voicemail panel. This panel can be accessed by selecting the voicemail button on the top right or setting it as a panel in the Layout. If a voicemail is selected, the details will appear in the lower area with the ability to playback the recording.
The phone icon button will initiate a call to the voicemail contact.
Prerequisite:
Microsoft 365 Group Voicemails can be displayed in the Group Voicemail panel. On the panel, select the Microsoft 365 group in the Voicemail groups drop down and twenty-five of the latest voicemails for that group will be displayed.
If a voicemail is selected, the details will appear in the lower area with the ability to playback the recording.
The phone icon button will initiate a call to the voicemail contact.
Ellipsis menu | Settings Policies
Settings policies will be applied in the following order from general to specific. The more specific policy will be applied to the user.
Application defaults (No policy applied)
Default policy
User level policy
Settings policies tab | New
Give the policy a name and description (optional).
If the Is Default option is selected, all users will be assigned this policy unless another policy is assigned at the user level. Only one policy can be set as default.
Select the Configure Tab
Configure the appropriate settings. Each setting or group of setting have the option to be Admin Enforced.
Settings with lists, like search sources and contact groups, can be admin enforced at the item level or the entire setting level.
When completed, select the Save policy changes button.
Policy User Assignments tab | New
Select a Settings Policy
Search for a user by display name | Select the appropriate user | Save.
Settings | Caller Info
The call pop lookup URL is queried when there is an incoming call. The webpage will be shown in an Iframe on the call pop panel. The caller display name, caller number, queue name, and/or call ID can be included in the URL by using the supported placeholders. See example URL with placeholders below:
If selected, the above URL will be shown in a new browser tab instead of the call pop panel.
Alternatively, an adaptive card can be displayed in the call pop panel when there is an incoming call. Adaptive cards can be designed here and the JSON code copied into the Adaptive Card text field. Place holders that can be used in the call pop URL can also be used in the adaptive card.
Example Adaptive Card
{
"type": "AdaptiveCard",
"body": [
{
"type": "TextBlock",
"size": "Medium",
"weight": "Bolder",
"text": "Call Information:"
},
{
"type": "TextBlock",
"text": "${displayname}",
"wrap": true
},
{
"type": "TextBlock",
"text": "${callernumber}",
"wrap": true
},
{
"type": "TextBlock",
"text": "${queuename}",
"wrap": true
},
{
"type": "TextBlock",
"text": "${callid}",
"wrap": true
}
],
"$schema": "http://adaptivecards.io/schemas/adaptive-card.json",
"version": "1.5"
}This feature is preview.
The Call History panel displays information about past calls answered in this instance of Landis Attendant Console.
There are two options for storing call history data:
Local Storage (Default) Call history is stored locally in the browser or application cache. When this option is used, missed calls and calls answered from other Landis Attendant Console instances or Microsoft Teams endpoints are not synchronized and will not be displayed.
Landis Server Storage. Call history is stored and synchronized through Landis servers. With this option enabled, missed calls and calls answered from any Landis Attendant Console instance are displayed across all connected instances. Enable this option by navigating to Settings > Advanced > Save and Sync Call History.
The historical call records will appear at the top of this panel and will be sorted from most to least recent.
Calls handled in Attendant Console from the last 14 days will appear in this panel.
A call record can be selected, and more detail will appear in the bottom panel. See below:
Caller information will appear at the top of this panel.
Notes about the caller can be viewed, edited, or added for future reference. By default, these notes are personal, but they also can be shared with multiple users.
To configure notes, see
The historical transcription of this call will be displayed in this area. The text can be coped to the clipboard by selecting the clipboard button. To enable historical transcription, go to Settings | Advanced | enable Save Transcription to Local Call History.
AI prompt history will appear on this tab. The response text can by copied by selecting the clipboard button. For more information, see
Below is a list of AI features integrated into the software:
AI Prompts can be created to perform an action using AI on the transcription of the call. See . This feature supports customer provided Azure resource. See
Get information about the logged in user.
Get shared Exchange contacts.
Get Azure AD User info, such as name, email, phone, department, photo, manager, direct reports.
Get Azure AD User info such as name, email, phone, department, photo, manager, direct reports.
Get schedule (calendar) for Azure AD users.
Get Exchange contacts.
Required for sign in
Required for sign in
Required for sign in
Get members in a Teams team for contact groups.
Get presence for Azure AD users.
Send a chat or chat callback remind to another user.
Create a chat in order to send a chat or chat callback remind to another user.
Get Azure AD User info, such as name, email, phone, department, photo, manager, direct reports.
Get and change user defined Teams presence.
First run populate favorites contact group
Get the count of unread voicemails.
Get voicemail details and mark voicemails as read.
Search global Exchange contacts and/or display global Exchange Contact groups.
Change call delegate setting.
Connect to your own Azure AI model.
Ability to answer/transfer calls etc.
Manage chat threads for some call scenarios.
Get Azure AD User info, such as name, email, phone, department, photo, manager, direct reports.
Opt in/out of Teams Call Queues.
Settings | Quick Access Shortcuts
Quick Access Shortcuts are customizable buttons designed to streamline frequent tasks
These buttons are displayed on the Quick Access Shortcuts panel. See
To rearrange the display order of the buttons on the Quick Access Shortcuts panel, select a shortcut from the list and use the up or down arrow to adjust its position.
This shortcut will start a new call to a user/phone number, or a live call can be transferred to the user/number. You can add multiple call user shortcuts to create a speed dial list of internal and external contacts.
New | New call user shortcut
Once the shortcut has been added, it will appear as a clickable button on the quick access shortcut panel.
A bull horn icon will appear on the top right corner when there is a software notification. The notifications can be displayed by clicking on the bull horn icon. These notifications may include actions that are required by the user and/or IT administrator.
Prerequisite: Enable unread voicemail count
An envelope icon with a number will appear on the top right corner when there is an unread Teams voicemail. The number shown is the count of unread voicemail messages. Selecting the icon will open the voicemail panel.
Shortcut Display Name
Name of shortcut displayed on button.
Description
Description of Action.
Keyboard Shortcut
Keyboard Shortcut that performs the action.
This option will open the specified webpage in the browser.
New | New open webpage shortcut
Once the shortcut has been added, it will appear as a clickable button on the quick access shortcut panel.
Shortcut Display Name
Name of shortcut displayed on button.
Description
Description of Action.
This option will execute the specified HTTP method to the specified URI. The Headers and Body can also be specified.
New | New execute HTTP request shortcut
Once the shortcut has been added, it will appear as a clickable button on the quick access shortcut panel.
Shortcut Display Name
Name of shortcut displayed on button.
Description
Description of Action.
This option will set the active audio device used in Landis Attendant Console.
New | New set audio devices shortcut
Once the shortcut has been added, it will appear as a clickable button on the quick access shortcut panel.
Shortcut Display Name
Name of shortcut displayed on button.
Description
Description of Action.
This option will change the signed in user's Teams presence
New | New set presence shortcut
Once the shortcut has been added, it will appear as a clickable button on the quick access shortcut panel.
Shortcut Display Name
Name of shortcut displayed on button.
Description
Description of Action.
This option will change the current call as delegate setting.
New | New set call on behalf of shortcut
Once the shortcut has been added, it will appear as a clickable button on the quick access shortcut panel.
Shortcut Display Name
Name of shortcut displayed on button.
Description
Description of Action.
Keyboard Shortcut
This option will change the signed in user's Teams status message.
New | New set user status message shortcut
Once the shortcut has been added, it will appear as a clickable button on the quick access shortcut panel.
Shortcut Display Name
Name of shortcut displayed on button.
Description
Description of Action.
Keyboard Shortcut
This option will change the current layout
New | New set layout shortcut
Once the shortcut has been added, it will appear as a clickable button on the quick access shortcut panel. If Selected Layout is enabled on the footer, the set layout buttons will also appear on the footer
Shortcut Display Name
Name of shortcut displayed on button.
Description
Description of Action.
Keyboard Shortcut
UPN or PSTN
The user principal name or phone number of the contact in E.164 format.
Transfer to Voicemail
If this is enabled, any transfers to this shortcut will be connected to the user voicemail. This applies to UPN transfers only.
Keyboard Shortcut
Keyboard Shortcut that performs the action.
Webpage URL
The URL of the webpage that will be opened.
Keyboard Shortcut
Keyboard Shortcut that performs the action.
HTTP Method
The HTTP Method: POST, GET, etc..
URI
URI of the request.
Headers
Headers included in the request.
Body
Body included in the request(optional).
Keyboard Shortcut
Keyboard Shortcut that performs the action.
Microphone
Microphone that will be selected.
Speaker
Speaker that will be selected.
Keyboard Shortcut
Keyboard Shortcut that performs the action.
Presence
Teams Presence option that will be selected.
Duration in minutes (optional)
Duration of the Teams presence option that is selected before resetting.
Keyboard Shortcut that performs the action.
Call on Behalf of Delegators
The delegator that will be selected.
Keyboard Shortcut that performs the action.
Status message
The message that will be set as the Teams status message.
Duration in minutes (Optional)
How long the message will be displayed as the Teams status message.
Keyboard Shortcut that performs the action.
Layout
Name of layout to enable. These are created in Settings | Layout
Icon
If Selected Layout is enabled on the footer, this is the icon that will be displayed on the footer button
By default, all users have access to Landis Attendant console, but this can be restricted in the Azure enterprise application registration
Browse to https://portal.azure.com
Search for Enterprise applications
Search for "Landis Attendant Console"
Select “Landis Attendant Console” from the list.
Select properties on the left side
Enable “Assignment Required”
Save
Select “Users and Groups” on the left side
Add the users that should have access to Landis Attendant console.
Landis Attendant Console consists of multiple configurable panels. Below is the default layout:
Left (1.1) panel is the call handling area. See Call Handling
Top center (2.1) panel is the search results area. See Search for Contacts
Bottom center (2.2) panel is the contact card area. See
Right (3.1) panel is the contact groups area. See
TCP: 443 ac.landis.cloud
TCP: 443 cc.landis.cloud
TCP: 443 landisattendantconsole.service.signalr.net
ACS
The three most recent versions of the browsers listed below are supported.
Edge for Windows & Mac
Chrome for Windows & Mac
Mobile operating systems including IOS and Android are not supported.
The settings window can be accessed by selecting the "..." button on the top right corner of Landis Attendant Console, then select Settings.
Settings | Advanced
Logging level determines what level of logs are collected. If enabled, only the previous 15 min of logs are collected and can be exported.
These options allow a user to import and export the current settings applied in attendant console.
Normalization rules are applied when a user enters a number in the search field. For example, if the user enters 7177330793, a normalization rule can translate the number to +17177330793. Regular expressions are used to match and translate a number.
Custom settings can be enabled by adding specific JSON objects to this field.
After adding a custom setting, a restart or refresh of the application is required for the custom setting to be applied.
These features can be enabled by selecting the checkbox beside the experimental feature.
Reset Selected Delegator to Myself after 1 Call. See
End of call webhook will send call data in the body of an HTTP POST to a URL. The call data can include transcription, AI prompt responses, participant info and call times.
The external site URL is the website that is shown on the External Site panel. This panel can be enabled in the Layout tab in the settings. This website is required to be iframe compatible.
This feature is
Settings | AI Prompts
AI Prompts can be created to perform an action using AI on the transcription of the call. These actions can be triggered in multiple ways:
1. Triggered manually by pressing the Generate Prompt button on the AI Prompts tab on the Call Details panel. When using this method, the response will be shown on the same panel. The response can also be shown in the call history panel if the setting Save Response to Local Call History is enabled.
2. Triggered on chat callback reminder, email callback reminder, or chat consult transfer creation. When using this method, the response will be displayed in the consult transfer chat or callback reminder. The response can also be shown in the call history panel if the setting Save Response to Local Call History is enabled.
3. Triggered automatically at end of call. When using this method, we recommend enabling the setting Save Response to Local Call History. The response will then be shown in the call history panel.
4. Triggered manually by pressing a keyboard shortcut. When using this method, the response can be shown on the Call Details panel or the call history panel (if the setting Save Response to Local Call History is enabled).
To initiate an outbound call, select a contact in the search or contact group panel. To initiate a PSTN call, enter the number in the search field. A contact with the normalized number will appear in the search panel.
When a number is entered in the search field, an Entra reverse number lookup will be initiated. If there is a match, contacts will also appear in the search panel.
Incoming Teams calls will appear at the top of the calls panel. Multiple incoming calls will appear in a list. Each incoming call will show the caller ID with an accept and decline button.
If a call is accepted, the call will appear in the center of the calls panel.
The caller ID, status of the call and call timer will be displayed. If the remote participant(s) have video enabled, a video icon will be displayed. Selecting the video icon will display the video panel (if enabled in the ).
The following call handling options will be available to most calls:
This button will mute or unmute the agent's audio.
Your Teams presence is shown on the avatar on the top right corner.
Your Teams presence can be changed by selecting the avatar on the top right corner and selecting one of the available Teams presence options.
The clock icon that appears when hovering over a presence option can be selected to set the duration of the selected presence. After the duration expires, the presence will reset.
Call control functionality using buttons on USB audio devices is compatible exclusively with Jabra Teams Certified headsets (1)
Audio on other Teams certified headsets will work, but the answer/hangup and mute/unmute buttons will not function.
Call Park (2) (Workaround: Use chat consult)
Contact groups are typically used for contacts that are frequently contacted. Each group will typically show a list of .
Contact groups can be created by selecting the more button on a contact | Add to Contact Group | Create New Group
Contacts can be added to an existing group by searching for a user | selecting the more button on the contact | Add to Contact group | Select an available contact group. Contacts can be added to any groups that of that type. For example, an Exchange contacts can only be added to Exchange groups.
To view all the available settings for contact groups, see
This is another type of group that is displayed in Landis Attendant Console, but are created and edited in the Teams People app. To create categories in the People app, see:
To enable or disable, see
Looking for an easy way to spot those calls that have been on hold forever? We've got you covered with a visual alert!
Open settings | Transfer | Enable Hold Time Alerts
If the hold time matches the warning set time, you'll see a red progress bar pop up on the held call. Once it hits the critical time, you'll notice a flashing red triangle too. If the audible alert is turned on, you'll hear a beep when it reaches the critical time.
Your current Teams status message can be viewed on the menu that appears after selecting the avatar on the top right corner.
You can add a Teams status message to your user by selecting the avatar on the top right corner and selecting Set Status Message.
Your Teams status message can be changed by selecting the pencil icon to the right of your Teams status message.
Your Teams status message can be deleted by selecting the trach can icon to the right of your Teams status message.
Hey there! The Landis Attendant Console makes it super simple for agents to sign in and out of Teams call queues.
Enable the Teams Call Queues panel: Settings | Layout | Select the Teams Call Queues drop down menu | Select a location for the panel. It may appear as a tab if more than one panel is assigned to the same location.
When you open the Teams Call Queues panel, you'll see a button. Hit that button, and it'll pop open a browser window showing the Teams call queues, plus an option to sign in or out!
Settings policies allow an admin to deploy settings for users. Each policy includes one or multiple settings. The settings in these policies can be applied as default or admin enforced.
Default Settings: Settings that do not have the admin enforced box checked will fall into this category. This option will configure the default settings but will allow users to change the settings.
Admin Enforced Settings: Settings with the admin enforced box checked will configure the settings and these settings will not be editable by users.
Settings will be applied in the following order:
Application default settings (No policy applied)
(Coming Soon) Teams Contact Groups/Teams People app Categories do not show in Attendant Console (3)
1 - Requires headset vendor APIs which only Jabra currently provides. 2 - Adding this functionality requires a Microsoft API that is not yet available. 3 - Microsoft API now available and feature is now possible.
Default policy, settings not admin enforced
User level policy, settings not admin enforced
End user configured settings
Default policy, settings admin enforced
User level policy, settings admin enforced
Example Scenarios:
Scenario 1: An end user configures a setting (option 4). This will override the setting configured in option 1, 2, and three.
Scenario 2: A setting is configured in a user level policy and is admin enforced (option 6). This will override all other settings configured in option 1, 2, 3, 4, and 5.
Description
Description or name of normalization rule.
Pattern
Pattern to match
Translation
Translation of number after it has matched the pattern.
Normalize Contact Numbers
When a number is selected on a contact, the number will be normalized when the call is initiated.
End of Call Webhook URL
URL of where the HTTP POST is sent
Header Key and Value
HTTP Post custom headers. (optional)
Experimental features may change, break, or disappear at any time. Landis Technologies and Microsoft cannot guarantee support for experimental features. Our technical support teams may not be able to help you with issues that may appear. See Feature States

Triggered by Call Transfer Summary. When using this method, the response can be sent along in the chat to the transfer recipient.
Display Name
This display name of the AI prompt.
Description
Optional description of the AI Prompt.
Prompt
Adaptive cards can be configured to be displayed as the AI prompt response.
First, the AI prompt is required to return a JSON object. See example Below:
Second, the properties in the JSON object can be referenced in the adaptive card: ${PropertyName}
Adaptive cards can be designed here: https://adaptivecards.microsoft.com/designer
See example adaptive card below that can be used with the prompt above:
Enable Real-Time Speech to Text will allow closed captions to function on the Call Details Panel
Save transcription to Local Call History. See Call History
Enable AI Transfer Advisor (Private Preview)
Additional permissions are required to connect to your own Azure OpenAI model. See Permissions
These settings give you the ability to connect to your own Azure OpenAI model for the AI prompts.
Create or use an existing Azure OpenAI model.
Grant permissions to Foundry resource.
Grant the attendant console users the Cognitive Servises OpenAI User role.
Copy the Endpoint Target URI from the model. Use the instructions below to parse the URL and gather the required information to populate the setting fields.
Endpoint URL: The protocol and domain name of the URL
Deployment Name: The URL pathname after /deployments
API Version: The contents of the api-version URL parameter
Example Endpoint Target URI:
https://contoso.cognitiveservices.azure.com/openai/deployments/o4-mini/chat/completions?api-version=2025-01-01-preview
Endpoint URL: https://contoso.cognitiveservices.azure.com
Deployment Name: o4-mini
API Version: 2025-01-01-preview
Summarize this call and return JSON object formatted like:
{
“Summary”: “CALLSUMMARYHERE”
}{
"type": "AdaptiveCard",
"body": [
{
"type": "TextBlock",
"size": "Medium",
"weight": "Bolder",
"text": "Call Summary"
},
{
"type": "TextBlock",
"text": "${Summary}",
"wrap": true
}
],
"$schema": "http://adaptivecards.io/schemas/adaptive-card.json",
"version": "1.5"
}This button will open the dial pad. This dial pad can be used to send DTMF tones while on a call.
This button will turn your video on or off.
This button will place the call in blind transfer mode. This option will transfer the call and if the transfer recipient does not answer, the call will be sent to voicemail or follow forwarding rules.
To perform a blind transfer, select the blind transfer button and select a contact in the search or contact group panel and the call will be transferred.
To transfer a call directly to a user's voicemail, select the blind transfer button and select the voicemail option on the transfer destination contact. Transfer to voicemail is only available for internal contacts. Also note that a contact's voicemail cannot be called directly.
This button will place the call in safe transfer mode. This option will transfer the call and if the transfer recipient does not answer, the call will be redirected back to the agent on hold.
Note: Safe transfers to a PSTN number will fail because the system is not aware when a third-party voicemail service answers the call.
To perform a safe transfer, select the safe transfer button and select a contact in the search or contact group panel and the call will be transferred.
This button will place the call in consult transfer mode. This option will allow the agent to consult with the transfer recipient before transferring the call.
To perform a consult transfer, click the 'Consult Transfer' button and choose the recipient from the search or contact group panel. This action will place the caller on hold and initiate a call to the transfer recipient. When you're ready to complete the transfer, click either the large Transfer button or the Consult Transfer button on the current call. The agent will then be disconnected, and the caller will be transferred to the recipient.
This button will place the call in chat consult transfer mode. This option will allow the agent to send an adaptive card to the transfer recipient that will give them the option to accept, reject, or send the call to voicemail.
To perform a chat consult transfer, select the chat consult transfer button and select the transfer recipient contact in the search or contact group panel. This will put the caller on hold and send the transfer recipient an adaptive card. When the transfer recipient selects an option on the adaptive card, the status of the call will update on the calls panel. The transfer can be completed from the status area.
This button will place the call in add participant mode. This option will allow the agent to add a contact to the call creating a conference call.
To add a participant to a call, select the add participant button and select a contact in the search or contact group panel. The contact will then be added to the existing call to form a conference.
This button will disconnect the call.
Calls that are placed on hold, are in the process of transferring, or have failed to transfer appear in a list on the bottom of the calls panel. Each call will show the caller ID, call timer, and current status. If a transfer mode has been selected for the call, the transfer type icon will appear on the call.
Calls on hold or that have failed to transfer can be retrieved by selecting the answer button. They can also be disconnected by selecting the more button and disconnect.
Calls can be transferred directly while on hold by selecting the more button and selecting a transfer mode. If an incorrect transfer mode has been selected, it can be changed from this menu. After the call has been placed in a transfer mode, select a contact in the search or contact group panel and the call will be transferred.
A call on hold can be transferred to a current call by selecting the more button | Transfer to Current Call.

Contacts are shown in both the search and contact group panels. These contacts include contact information and contact methods. Contacts are used to initiate communication with a contact or to select a contact as a transfer recipient. Default contact methods shown are chat and Call (using default method). Additional contact methods are shown by selecting the more button.
If a call is in a transfer mode, double clicking or selecting a voice contact method on the contact will initiate a transfer to the contact.
A new chat or email can be initiated with a contact by selecting chat or email buttons.
Selecting a contact method on the contact will initiate a new call, chat, or email to the contact. Double clicking the contact will initiate a new call to the contact.
Chat or email callback reminders are not available in this scenario.
This feature enables you to quickly send a chat or email message to another user letting them know that the caller has requested a callback.
A chat or email callback reminder can be sent by selecting the email or chat callback reminder button when there is a current call. This will open a chat or email with the prepopulated callback message. The default callback message includes the caller name, number and call time.
Network proxy support
✓
For customers and partners already using our product, Attendant Pro for Skype for Business, below is a comparison of the products.
client architecture
The Call Details panel displays information about the selected call. By default, the system automatically selects the call that is most likely to be of interest based on the current call state. To view details for a different call, manually select it by clicking the gray selection bar located on the far right side of the call controls for either an active call or a call on hold.
Caller information will appear at the top of this panel.
Notes about a contact or caller can be added for future reference. By default, these notes are personal, but they also can be shared with multiple users.
Notes can be viewed or edited here or on the contact card panel.
To configure notes, see Notes
The transcription of the current call will be displayed in this area in real time. By default, the Spoken Language setting will match the default language of the application. This setting can be changed anytime mid call and will apply from that point forward.
The text can be coped to the clipboard by selecting the clipboard button.
AI prompts that have been enabled to be displayed on Call Details panel will appear on this tab. The display name of each prompt will be displayed along with a Generate Prompt button. During an active call, you can select the Generate Prompt button to receive the AI response below. The response text can by copied by selecting the clipboard button. For more information, see
To customize the information displayed on the footer and adjust the display order, right-click in the footer area to access the footer menu. You can toggle settings on or off and change the display order by dragging and dropping the items.
Transfer Type
Displays the transfer type that has been selected for the call.
Mic
Chat consult transfer enables the attendant user to send an adaptive card to an internal user when performing a chat consult transfer. This adaptive card has options the user can select to accept or deny a call transfer. When the transfer recipient selects an option on the adaptive card, the status of the call will update on the calls panel. The transfer can be completed from the status area.
There are two ways to deploy the bot:
User Impact: Calls placed on hold or calls in a transferring state may not appear in the handled calls panel. This affects environment utilizing direct routing.
Microsoft has made a change that has negatively affected the application.
RCA: Azure Communication Services made a change that stopped sending an expected property to the application. An update was released that allowed the application to respond correctly to these changes.
Start Time: 3/17/23 at 12:29PM EST
End Time: 3/17/23 at 4:31PM EST
User Impact: Users may not be able to sign into Landis Attendant Console.
Currently there is an APAC region Microsoft Teams/Azure Communication Services outage which is affecting Landis Attendant Console.
Start Time: 2/7/23 at 4:50PM EST
Settings | Connectors
Customers that are utilizing Landis Contact Center queues can enable the connector to allow agents to sign in/out of queues, change their agent status, enable/disable recording and display call pop and wrap up questions.
Enable the setting to Use Landis Contact Center Integration
If applicable, select the appropriate Landis Contact Center organization from the list | Submit
Agent Status, Queue sign in/out, and Live Queue stats can be accessed in the Queues panel. This panel can be either persistent in the layout or appear termporarily as needed (Smart Panel).
Hey, are you a fan of dark mode? We can totally enable that in Landis Attendant Console!
Just go to Settings | General | Theme | Select Dark | Select Apply and Reload. And just like that, you're in dark mode! Enjoy!
Deep packet inspection support
✓
Teams desktop app toast alert suppression
✓
Global shortcut keys
✓
Click to dial
✓
Focus on incoming call
✓
Incoming call toast alert
✓
Full client
controls 1st party client
architecture
SaaS/Web Application
Windows application
Reporting
Not available. Use Landis Contact Center reporting.
Native
Recording
Not available. Use Landis Contact Center Recording.
Native


Light, Dark, or Classic mode. Default is light mode.
Suppress Teams Notifications
If enabled, Teams desktop client call notifications will be suppressed. A restart of the application is required for this setting to take effect. (Desktop app only)
Max notifications to show
Max amount of Attendant Console notifications to show at one time. Default is four. (Desktop app only)
The Teams desktop application language is required to match the Landis Attendant Console language for the Teams call notifications to be suppressed.
Browse to Teams admin portal | Teams apps | Setup policies
Search and add the Landis Attendant Console bot app to an existing policy or create a new policy and assign to users.
In Landis Attendant console, open settings | Transfer | Call Button Visibility
Under Chat Consult Transfer, select Full.
User Impact: Some users are not able to sign into Landis Attendant Console. Authenticated users are not affected.
RCA: A secret expired which prevented users from getting an authentication token.
Start Time: 12/9/22 at 4:41PM EST
End Time: 12/9/22 at 4:56PM EST
User Impact: Users may not be able to sign into Landis Attendant Console.
Azure Communication Services is experiencing some connectivity issues which is affecting Landis Attendant Console.
Start Time: 9/7/22 at 1:20PM EST
End Time: 9/7/22 at 3:55PM EST
User Impact: Users not able to sign into Landis Attendant Console.
Currently there is an Azure Communication Services outage which is affecting Landis Attendant Console.
Update: 8/12/22 at 10:15PM Microsoft is rolling out a hotfix to resolve the issue. Some locations may see the issue resolved.
Start Time: 8/12/22 at 2:30PM EST
End Time: 8/12/22 at 11:30PM EST
An Azure service anomaly was reported as affecting customers at 1/22/22 12:55pm EST. On deeper investigation we noticed abnormal Azure service performance.
1/22/2022 2:50pm EST The issue was resolved by migrating to a different Azure service plan.
RCA: We are working with Microsoft Azure to determine why the service level deteriorated. In addition, we will be adding additional health checks to our service.
Persistent panel: Settings | Layout | Enable the Queues panel on the layout
Quick access shortcuts buttons can be created to change an agent status or sign in/out of queue(s).
Settings | Quick Access Shortcuts | New
New set agent status shortcut or New set agent queue shortcut
Right click footer | Enable Agent status, Time in Agent Status, and Signed in Queues.
Clicking on any of these items on the footer will bring up the queues panel.
Recording can be enabled/disabled by selecting the record button on the live call controls. The capability for an agent to manage call recording is determined by the contact center's call setting policy.
A keyboard shortcut can be configured to enable or disable recording. Settings | Keyboard Shortcuts | Start/Stop Contact Center Recording
The current recording status can be shown on the footer. Right-click the footer to enable Recording Status.
Settings | Layout | Enable the Call Pop panel on the layout
This panel can be either persistent in the layout or appear termporarily as needed (Smart Panel).
Smart panel: See
Persistent panel: Settings | Layout | Enable the Wrap Up Questions panel on the layout
Calls can be made on behalf of a queue by selecting the avatar | select a queue "call as" option from the drop down. Once the setting has been changed, initiate a call as normal.
By default, the "call as" setting remains active until manually changed. However, if preferred, it can automatically switch back to calling as the signed-in user after one call. To enable this feature, navigate to settings | Advanced | enable Reset Selected Delegate to Myself after 1 Call.
There is also the ability to create a quick access shortcut to change the call as delegate setting. See
This is the prompt that will be sent to AI.
Display on Call Details
Displays this prompt as an option on the
Include as Option for Callback Reminders
Displays this prompt as an option on the as a placeholder.
Save Response to Local Call History
Save the AI prompt response to local history. This will allow the response to be viewed in the Call History panel.
Triggers: End of Call
Triggers the AI prompt at the End of the call. When using this trigger, we recommend enabling Save Response to Local Call History setting. The response can then be viewed in the call history panel.
Triggers: Keyboard Shortcut
Triggers the AI prompt by pressing the specified keyboard shortcut. When using this method, the response can be shown on the Call Details panel or the call history panel (if the setting Save Response to Local Call History is enabled).
Triggers: Utterance ()
Triggers the AI prompt when a keyword is mentioned in the call. The current phrase containing the keyword and the previous ten phrases will be sent in the prompt. Each new phrase will continue to trigger the prompt until the keyword is not included in the previous 10 phrases.
Displays the currently selected audio device mic. Audio levels are displayed on the mic icon.
Speaker
Displays the currently selected audio device speaker.
Presence
Displays the user's Teams presence.
Status
Displays the user's Teams Status message.
Voicemail
Displays the count of unread voicemail.
Selected Delegator
Displays the currently selected "call as" delegate or queue.
Selected Layout
See
Focus on Incoming Call
If enabled, the application will become the active window when there is an incoming call. (Desktop app only) (App restart is required for the setting to take affect.)
Settings | Permissions
Optional permissions that can be granted to enable more features.
This will enable a voicemail icon on the top bar with unread voicemail count.
This will enable the voicemail panel to retrieve voicemails and mark them as read when selected.
This will enable the group voicemail panel to retrieve Microsoft 365 group voicemails.
This will enable the ability to search global Exchange Contacts and/or display global Exchange Contact groups.
This will enable the ability to initiate calls as a delegate.
This will enable the ability to connect to your own Azure OpenAI model

Phone numbers on a webpage or application that appear as clickable links (TEL links) can be configured to open in Landis Attendant Console. After selecting the link, the phone number will appear in the search textbox and the contact will be shown in the search results.
Windows Settings | Apps | Default apps | In the search box under Set a default for a file type or link type, search for and select TEL | Set the default app to Landis Attendant Console.
Need a quick way to reach your favorite contacts? Create a speed dial list! It's perfect for those folks you call or transfer to the most.
Enable the Quick access shortcut panel: Settings | Layout | Select the Quick Access Shortcuts drop down menu | Select a location for the panel. It may appear as a tab if more than one panel is assigned to the same location.
Create Shortcuts: Settings | Quick Access Shortcuts | New | New call user shortcut
Add a Name, Description (Optional), and either a phone number or user principal name of an internal user. A phone number should be in this format: [+] [country code] [number including area code]. Example: +15551234567
To prevent any interference of Landis Attendant Console, add the following executables to the "exclusion list" process in the antivirus software.
%localappdata%\Programs\landisattendantconsole\Landis Attendant Console.exe
%localappdata%\Programs\landisattendantconsole\resources\auxiliary\WindowHandler.exe
Alternatively, the following folder, subfolders, and contents can be excluded:
%localappdata%\Programs\landisattendantconsole
Repeat steps 2-4 for each speed dial contact.
Now that you have your speed dial list created, select any of the contact buttons on the quick access shortcut panel to start a call or use them as a transfer destination!
For more options see Quick Access Shortcuts

Settings | Keyboard Shortcuts
Keyboard shortcuts can be configured to perform call candling actions. The actions are listed along with the shortcut key combination. When using the browser, keyboard shortcuts can only be used when the attendant console is the active window. When using the desktop application,
To clear a key combination, select the X to the right of the Action.
To change or enable a keyboard shortcut, select the name of an action and press the key combination desired. The key combination will appear in the key combination column. If the key combination does not appear, it is not an available key combination.
Prerequisite: Enable Opt In/Out of Teams Queues (Preview)
This feature is in preview.
The Teams Call Queues panel gives users the ability to view their Teams queues and opt in or out of them.
Refresh button: This will update the panel with the current signed in state of the queues.
Opt In/Out: Users can opt in or out of a queue by changing the toggle beside a queue and selecting Save.
Some queues may have the option to opt in/out disabled. This is because of the queue configuration in the Teams admin center.
Cancel button: This will disgard any changes that were made since the last save.
Open Teams Call Queues button: This will open the Teams queue opt in/out webpage in a browser.
Landis Attendant Console supports any headsets that are certified for Microsoft Teams.
Handsets are not supported at this time.
Settings | Layout
These options allow for editing existing or creating new layouts. Each layout gives you the ability to customize the size, location, and content of each panel.
Layouts can be changed by selecting another layout in the Selected Layout dropdown or by using a button.
To add a layout, select New and give the layout a name. There are multiple templates that you can use to get started. Once the preferred template has been selected, what is displayed on each panel can be configured. Each panel on the layout has a number assigned. These panel numbers can be selected for each of the options (Calls, Contact Search, etc.) Once you are satisfied with the layout, select Back to Settings and use the Selected Layout dropdown to select the new layout.
Some panels will appear as needed even when omitted from the current layout.
Settings | Devices
Prerequisite:
Additional setup is required for call as Teams queue. See
Calls can be made on behalf of another user or queue by selecting the avatar | select a "call as" option from the drop down. The call as menu option will only appear if (1) the user is a delegate of another user in Teams and is given the ability make calls or (2) a Queue has been manually configured to appear. Once the setting has been changed, initiate a call as normal.
By default, the "call as" setting remains active until manually changed. However, if preferred, it can automatically switch back to calling as the signed-in user after one call. To enable this feature, navigate to settings | Advanced | enable Reset Selected Delegate to Myself after 1 Call.
There is also the ability to create a quick access shortcut to change the call as delegate setting. See
Ctrl+Alt+Shift+1
Export Logs
Ctrl + (plus)
Zoom In (Desktop app only)
Ctrl - (minus)
Zoom Out (Desktop app only)
Ctrl+0
Reset Zoom (Desktop app only)
Dual core 1.1 GHz or faster
Hard Disk
2 GB of available space
Memory
8 GB RAM
Devices
Teams certified audio device
External search can query your custom search API and the response from the API can return contact information that will be shown in the search panel. A simple execution of this can be created by using Microsoft Flow.
External Search will send a HTTP POST to the specified URL. A JSON object with specific properties is sent in the body. The response body JSON array object(s) are expected to have specific property names.
Only populated properties will be sent in the body.
All properties are optional and the values can be null.
Properties are case sensitive.
Properties that are not expected will be ignored.
[
{
"azureAdId": null,
"givenName": "John",
"surname": "doe",
"displayName": "John doe",
"userPricipalName": "jdoe@contoso.com",
"companyName": "Contoso",
"jobTitle": "Sales Manager",
"department": "Sales",
"officeLocation": "New York",
"emailAddress": "jdoe@contoso.com",
"businessPhone": "810-653-3163",
"mobilePhone": "810-653-3163",
"preferredLanguage": null,
"notes": null,
"country": "USA"
}
]{
"searchTerm": "John Doe",
"departments": [
"Sales"
],
"officeLocations": [
"New York"
],
"countries": [
"USA"
],
"jobTitles": [
"Sales Manager"
],
"postalCodes": [
"10002"
],
"givenName": [
"John"
],
"surname": [
"Doe"
],
"displayNames": [
"John Doe"
],
"mail": [
"jdoe@contoso.com"
],
"userPrincipalName": [
"jdoe@contoso.com"
],
"maxContactSearchResults": "20"
}Contact Search
Enter a search term in the search field
Queues
Click on Agent status, Time in Agent Status, or Signed in Queue Count on footer. See
Voicemail
Click on Voicemail button on top right corner.
Wrapup Questions
Will be displayed automatically at end of call. See
Call Details
Calls
Panel where calls are handled. See
Contact Search
Panel where search results are displayed. See
Contact Groups
Device microphone used for calls.
Ring
Speaker used for incoming call alerts.
Silence Incoming Ring
Option to disable incoming call alerts.
Silence Call Waiting Tone
Option to disable incoming call alerts when in an active call.
Make a test call ()
Initiates a call to an audio test service to verify your audio device is working correctly.
Turn on noise suppresion
Noise suppression will remove background noise during an active call.
Speaker
Device speaker used for calls.
Microphone
Settings | Transfer
When a call is answered the specified transfer mode will automatically be selected. This will enable one click transfer.
If this option is enabled, when a transfer mode is selected the call will immediately be placed on hold.
These settings control what transfer options are available for calls.
*Transfer to Current Call is only shown in the context menu when a call is on hold.
These fields allow customization of the call back reminder chat, call back reminder email, and chat consult transfer messages. Placeholders can be added to the text by selecting a placeholder from the "Add" drop down menu to the right of each text field. AI prompts that have been included as an option for callback reminders will appear in the list of placeholders. All fields can be reset to default by selecting the "Reset to default" button below each field.
Chat consult transfer request message can be customized here. Placeholders can be added to the text by selecting a placeholder from the "Add" drop down menu to the right of the text field. AI prompts that have been included as an option for callback reminders will appear in the list of placeholders. All fields can be reset to default by selecting the "Reset to default" button below each field.
If "Enable Automatic Transfer from Hold" is enabled, the call transfer will automatically be initiated if the transfer recipient selects Accept or Send to Voicemail.
For more information on chat consult transfer see
If enabled, a chat message will be sent along to the transfer recipient. This chat message is customizable and can include an AI summary of the call. See
When the holding time is equal to the configured warning time, a red progress bar will appear on the holding call. When the critical time is reached, a flashing red triangle will also appear on holding call. If the audible alert is enabled, a beep will sound upon reaching the critical time.
If a transfer is unsuccessful, the call will be placed in a holding state. When the holding time is equal to the configured warning time, a red progress bar will appear on the holding call. When the critical time is reached, a flashing red triangle will also appear on holding call. If the audible alert is enabled, an alert will be played upon reaching the critical time.
If clear search bar after transfer initiated is enabled, the search field text will automatically be cleared when a transfer is initiated.
This feature is in preview. See Feature States
Prerequisites:
Verify the user is able to initiate calls as the Teams queue in the Teams client. For more info see:
Additional permissions are required to enable call as queue. See
In the Teams admin center, edit the Teams queue and locate the section labeled Assign calling ID. Select the resource account and click Copy object ID button. Paste the object ID(s) in the custom setting below. One or multiple object IDs can be listed.
[
{
"key": "additionalDelegators",
"description": "Array of additional delegators to add to the contact list. Array of strings of IDs",
"value": [
"Resource Account Object ID"
]
}
]In Landis Attendant Console, select Settings | Advanced | Copy and paste the custom setting in the Custom Settings text box. See example custom setting below:
Restart attendant console and now the resource accounts should appear in the "call as" dropdown list.
Features can be in of the several states of release as noted below.
Generally Available or GA
What is a Microsoft Teams Attendant Console? A soft client attendant has the following features:
A client optimized for handling multiple voice calls efficiently and quickly, especially transferring calls
Common, everyday tasks should be efficient
Easily search contacts, easy access to a large amount of contacts & quick overview of their status
Easily see caller context
Provides ability to tailor receptionist experience, customize to fit needs
A Microsoft Teams attendant console specifically, will additionally:
Easily enhance Teams calling experience without integration
Leverage unique Microsoft Teams strengths like presence, chat, bots & other Microsoft 365 components
Naturally fit into MS Teams endpoint lineup: Client, Phone, Rooms, etc.
Any questions? You can connect with us right now by clicking .
This is the status of all features unless otherwise noted. The feature is ready for everyone to use and fully supported under normal SLA's.
Everyone
Preview
This type of feature has supporting underlying API's, but is a new feature which is best for early adopters and those who need the feature. Support may take longer. This feature will become GA after a period of time.
Early Adopter
Experimental
A work around was used to bring an feature our customers want and there may be no current Microsoft supported method to achieve this feature. Experimental features may change, break, or disappear at any time. Landis Technologies and Microsoft cannot guarantee support for experimental features. Our technical support teams may not be able to help you with issues that may appear.
Bleeding Edge User
Private Preview
A limited-access program where a select group of users are invited to test and provide feedback on a new feature. These features are not recommended to be used in production. Please reach out to your account executive for more information.
Bleeding Edge User

Will be displayed when hovering over or selecting far right grey bar on the call controls of both active calls and calls on hold.
Panel where contact groups are displayed. See
Contact Card
Panel where contact details are displayed. See
Call Pop
Panel where call pop is displayed. See
Teams Call Queues
Panel that includes a button that opens Teams queue webpage for agents to sign in/out of Teams queues.
Quick Access Shortcuts
Panel where quick access shortcut buttons are displayed. See
Voicemail
Panel where personal voicemails are displayed. See
Group Voicemail
Panel where Microsoft 365 group voicemails are displayed. See
External Site
Panel that displays a persistent webpage. See
Call Details
Panel that displays details about the current active call. See
Queues
Panel that displays Landis Contact Center agent and queue information. See
Call History
Panel that displays local call history. See
Wrap Up Questions
Panel that displays Landis Contact Center Wrap Up Questions. See
Video Call
Panel that displays the video streams in a Teams call.
Full
Transfer Button will be shown on the current call area.*
Minimized
Transfer option will only be available on the "more" menu.*
Disabled
Transfer option will not be available.
By default, no users will have access to configure settings policies. Follow the steps below to allow users to access the setting policies portal:
| Enterprise Applications | Landis Attendant Console - API | Users and groups | Add user/group | Select a user or group | Select the Admin Settings role | Select the Assign button
The users should now be able to see a new option for Setting Policies when selecting the ellipsis button on the top right corner of Landis Attendant Console. If the option does not appear, sign out of Landis Attendant Console and sign in again.
Settings | Search
The default search source is Entra ID Users.
There can be multiple search sources of the same type with different configurations. Each search source will appear as another tab in the search panel.
To rearrange the display order of the search tabs on the contact search panel, select a search source from the list and use the up or down arrow to adjust its position.
Entra ID search will only search on display name and is a "begins with" search.
Search pre-filters will always filter the search results by the values in these fields.
The custom names added to these fields will be listed as persistent filter options in the advanced search panel. Multiple filter options can be added to each field. Each option must be separated by a semicolon. Example:
These options will appear in the Advanced search filter:
Exchange search will only search on display name and is a "contains" search.
Search Source Display Name
Custom display name of search source.
Folder ID
To retrieve an Exchange contact folder ID:
Create a contacts folder in Outlook or OWA.
Browse to
Sign in to Graph Explorer
Change the API URL to
External search can query your custom search API. The response from the API should return contact information that will be shown in the search panel.
For more information, see External Search
Search Source Display Name
Custom display name of search source.
People search will search on display name and email and is a "begins with" search. It also supports fuzzy matching.
Search Source Display Name
Custom display name of search source.
Max Contact Search Results
The maximum amount of contacts returned from a search.
Additional permissions are required to enable global Exchange contacts. See Permissions
Global Exchange Contacts will only search on display name and is a "begins with" search.
Search Source Display Name
Custom display name of search source.
Job Titles
Given Names
Surnames
Display Names
Emails
User Principle Names
Entra ID User Search
Also known as Active directory users or Microsoft 365 users.
Exchange Search
Personal Outlook contacts
External Search
Custom API Contacts
People Search
Returns organization users and contacts relevant to the signed in user. Supports fuzzy matching.
Global Exchange Contacts Search
Mail contacts. Also known as Active Directory contacts or organizational contacts.
Search Source Display Name
Custom display name of search source.
Max Contact Search Results
Departments
Office Locations
Countries
The maximum amount of contacts returned from a search.
Postal Codes
Has a caller ever asked for a user to return their call when they are available? We've got just the thing for you!
This feature will allow you to quickly send a prepopulated chat message to another user letting them know that a caller has requested a callback. This message will automatically include the caller name, number, and call date/time. What used to take minutes, now takes a few seconds!
A chat callback reminder can be sent by selecting the chat callback reminder button when there is a current call. This will open a chat with the prepopulated callback message. You can edit the message if necessary and then send the message.
For more details see Callback Reminders
Settings | Contacts
The default contact group is a list of Entra ID Users that are relevant to the user.
Each contact group can be either a dynamic group based on search terms, or users in a Teams team.
To rearrange the display order of the contact group tabs on the contact groups panel, select a shortcut from the list and use the up or down arrow to adjust its position.

Select "Modify permissions" tab. Verify consent has been granted to Contacts.Read. If not, consent.
Run Query
Copy the id of the appropriate contact folder and enter it into Folder ID field in Attendant Console.
The Exchange Mailbox contact folder ID.
User ID or UPN
The Azure active directory ID (GUID) or the user principle name of the mailbox. This can be a primary mailbox or a mailbox with delegated permissions.
Max Contact Search Results
The maximum amount of contacts returned from a search.
External Contact Search URL
External API URL to query for search results.
Max Contact Search Results
The maximum amount of contacts returned from a search.
Subclass
Types of contacts that are returned. See: https://learn.microsoft.com/en-us/graph/search-concept-person#person-types
Max Contact Search Results
The maximum amount of contacts returned from a search.
Search Group
Entra ID Users. Also known as Active Directory users or Microsoft 365 users.
Teams Team Group
Users in a Teams team. 100 Contact limit.
Exchange Group
Personal Exchange contacts
This group type can only show Entra ID users.
Display Name
Name of contact group
This group type can only show the users in the specified Teams team.
This group type can only show Exchange contacts.
Additional permissions are required to enable global Exchange contacts. See
This group type can only show global Exchange contacts.
This setting will configure the group that will automatically be selected when Attendant Console is loaded.
This setting will enable or disable Teams Contact Categories displayed as groups on the contact groups panel.
Teams Contact Categories are created and edited in the Teams People app. To create categories in the People app, see: https://support.microsoft.com/en-us/office/manage-your-contacts-with-the-people-app-in-teams
This is the priority of contact methods evaluated when using the "CallDefault" button or double clicking a contact card. For example, if the first contact method listed is Teams, the Attendant Console will initiate a Teams call. If the user is not enabled for Teams, it will try the second contact method on the list and so on.
This setting will configure the buttons and order of buttons that are shown on contacts.
This setting will configure the text that is shown on contacts. There can be up to three lines of text on each contact. The text that is displayed on each line is configured by entering plain text and/or placeholders for the desired fields. A placeholder can be inserted by selecting a placeholder from the dropdown to the right of the field. The cursor position is saved and used for the insert.
Smart separators and labels allow text to only show when needed.
Smart separators are anything put inside curly braces that is not a recognized placeholder. Smart separators have the ability to intelligently be hidden when the placeholder to its left or right evaluates to an empty string. This only applies when the smart separator is directly against another curly braced item such as a placeholder.
Labels are text put inside <> which is nested inside a curly braced field. In this case, the label will only show when the field accompanying it evaluates to text rather than an empty string.
Plain text outside of curly braces will be displayed all the time.
Note: Multiple spaces will be ignored and treated as a single space
In the example above, the "Dept: " label will only show if the department field is populated for the contact. The smart separator " - " will only show if the contact has both a department and a job title. The label "Job Title: " will only show if the job title field is populated for the contact.
This setting is enabled by default. Disabling this setting will not allow users to save contact notes in the contact card panel or call details panel.
Contact and caller notes can be shared between multiple users by generating a group of characters (key) and entering the same characters in the Contact Note Group Key field for each user.
If enabled, notes can be searched by entering a search term in the search field at the top center of Landis Attendant Console. The search results will be shown as contacts on the Contact Notes tab in the contact search panel.
{<Dept: >Department}{ - }{<Job Title: >JobTitle}Max Contact Search Results
Max amount of contacts that will be displayed in the contact group.
Folder ID
The Exchange Mailbox contact folder ID.
User ID or UPN
The Azure active directory ID (GUID) or the user principle name of the mailbox. This can be a primary mailbox or a mailbox with delegated permissions.
Departments
Filter by user departments.
Office Locations
Filter by office locations.
Countries
Filter by user countries.
Postal Codes
Filter by user postal codes.
Company Names
Filter by company names.
Job Titles
Filter by user job titles.
Given Names
Filter by user given names.
Surnames
Filter by user surnames.
Display Names
Filter by user display names.
Emails
Filter by user emails.
User Principle Names
Filter by user principle names.
Max Contact Search Results
Max amount of contacts that will be displayed in the contact group.
Company Names
Filter by user company names.
Job Titles
Filter by user job titles.
Given Names
Filter by user given names.
Surnames
Filter by user surnames.
Display Names
Filter by user display names.
Emails
Filter by user emails.
User Principle Names
Filter by user principle names.
Global Exchange Contacts Group
Mail contacts. Also known as Active Directory contacts or organizational contacts.
Max Contact Search Results
Max amount of contacts that will be displayed in the contact group.
Departments
Filter by Entra ID user departments.
Office Locations
Filter by Entra ID user office locations
Countries
Filter by Entra ID user countries.
Postal Codes
Filter by Entra ID user postal codes.
Company Names
Filter by Entra ID user company names.
Job Titles
Filter by Entra ID user job titles.
Given Names
Filter by Entra ID user given names.
Surnames
Filter by Entra ID user surnames.
Display Names
Filter by Entra ID user display names.
Emails
Filter by Entra ID user emails.
User Principle Names
Filter by Entra ID user principle names.
Display Name
Name of contact group
Select a Teams team
Display Name
Name of contact group
Display Name
The members of the Teams team will appear in the contact group.
Name of contact group
Settings that roam with user and administrator can set the default and/or enforce.
See
keyboardShortcutValues
Array of Keyboard shortcuts
YES
YES
layoutConfig
Layout Configuration
?? TBD
?? TBD
micDeviceInfo
selected microphone
NO
NO
speakerDeviceInfo
selected speakerphone
NO
NO
ringDeviceInfo
selected speaker for ring sound
NO
NO
ringDisabled
Disable ring sound
YES
YES
callPopLookupUrl
lookup url for callpop
YES
YES
defaultTransferMode
default transfer mode when a call is answered
YES
YES
holdOnTransferMode
call placed on hold as soon as a user puts it in a transfer mode
YES
YES
contactEndpointOrder
Order of contact endpoints to use when calling a user
YES
YES
contactLayoutButtons
buttons that show on contact card
YES
YES
contactLayoutTextBlocks
text that is show on a contact card
YES
YES
contactGroupsMulti
Array of Contact Groups
YES
YES
defaultSelectedContactGroup
Default selected contact group
YES
YES
contactSearchListsDefinitions
Array of contact search sources
YES
YES
buttonVisibleBlindTransfer
should blind transfer button be shown
YES
YES
buttonVisibleSafeTransfer
should safe transfer button be shown
YES
YES
buttonVisibleAddParticipant
should add particiapnt button be shown
YES
YES
buttonVisibleConsultTransfer
should consult transfer button be shown
YES
YES
customSettings
array of custom settings
YES
YES
quickAccessShortcuts
Array of quick access shortcuts
YES
YES
normalizationRules
array of number normalization rules
YES
YES
future Theme Setting?
?? TBD
?? TBD


We have designed Attendant Console to be as simple as possible to setup.
Browse to
Select the Admin Consent link on the bottom of the page and sign in with a Microsoft 365 Global administrator account. This will allow Landis Attendant Console to operate in your Microsoft 365 environment. After the permission have been granted, you will be redirected back to the Attendant console login page. For more information on required app permissions, see
On the Attendant console login page, select the sign in button on the center of the page and authenticate with your Microsoft 365 (Microsoft Teams) account.
Once logged into Attendant console, you will be prompted to sign up for a trial. Enter your trial contact information and select Sign-up.
After signing up for the trial, you will be logged into the attendant console. The browser will prompt to allow the webpage to use your microphone. Select allow.
Settings | Permissions tab | Grant consent for Mail.ReadBasic
Settings | Permissions tab | Grant consent for Mail.ReadWrite
Settings | Layout | Configure Layout | Under Voicemail, select a panel number | Apply
Settings | Permissions tab | Grant consent for Group.Read.All
Settings | Layout | Configure Layout | Under Group Voicemail, select a panel number | Apply
Settings | Permissions tab | Grant consent for CallDelegation.ReadWrite
See
Settings | Permissions tab | Grant consent to the following:
Access Microsoft Teams and Skype for Business data as the signed in user
Access Landis API as the signed in user
Settings | Layout | Configure Layout | Under Teams Call Queues, select a panel number | Apply
See
Now you are ready to handle Teams calls in Landis Attendant Console!
A description of new user features in Landis Attendant Console for Microsoft Teams. For the complete list of updates, see Release Notes You can connect with us right now by clicking Talk to Sales.
Sign up for Attendant Console update emails here: https://landistechnologies.com/newsletter/
Two improvements to the Call Details panel.
See Call Details for the most relevant call. The panel now automatically displays call details for the call a user is most likely to need.
Use case: A secretary needing to consult a technician about a caller’s issue, can place that call on hold without losing access to the transcript, and review those details with the tech.
Any other call can also be selected to see its details. The call with currently displayed call details is clearly marked.
Open Call Details on hover. When Call Details is not part of the layout, a thin gray bar sits at the edge of the call area. Hovering over the bar or clicking it opens the panel with prompts, captions, and the rest of the call information.
Save and sync call history across devices. A new setting saves call history on a server rather than in the browser cache so that it appears on every device a user signs in from. A call answered in the web app also shows up in the desktop app.
See Missed calls. Call history now includes missed calls, not only answered calls.
The setting is under Settings > Advanced > Call Settings. It is off by default, each user controls it individually, and records are kept for 14 days.
See contacts’ meeting locations. Contact details for an Entra user now show the meeting location or conference room in the calendar view when the meeting has one.
Start and stop video. A keyboard shortcut is now available for turning the camera on and off. The shortcut is unassigned by default, and users assign it under keyboard shortcuts in Settings.
Use new light theme. A Light theme to match the Microsoft Teams light theme joins Dark and Classic. The previous theme is now named Classic, and existing users stay on Classic with no visual change. New users start on Light.
Switch themes without a reload. Selecting a theme applies it right away. The apply-and-reload step is gone.
Access similar UI features from one place. Call history, voicemail, and group voicemail can share one position. The icon on the panel in settings turns the setting on, and resizing one panel then resizes the others. Panels moved to a different location stop syncing with the group.
Get notified of relevant app info. The desktop app shows a center screen notification on a zoom level change or when a contact is added to a group it already belongs to.
Enjoy updated UI controls. Popups, spinners, dropdowns, and lists now use improved UI controls. The visible difference is in list scroll bars, which stay slim and fade out when the list is not in focus.
Scan AI responses easier. AI responses keep their bullet points and line breaks rather than running together into a single block of text.
If you would like to read the full list of improvements and updates, read the here.
Noise suppression is now available in Attendant Console (browser version). Turn it on under Settings > Devices and background noise is filtered out for the duration of your calls.
Voicemail, wrap-up questions, and contact details no longer require dedicated panel space in your layout. They appear as flyouts when they’re relevant and disappear when they’re not. Hover over any contact avatar to pull up their contact card instantly.
If a receptionist answers a call on their mobile or another Microsoft Teams client, Attendant Console now detects that active call and offers options to join or transfer it to the console. Walking back to your desk doesn’t mean losing the caller.
Attendant Console now supports video calls. For internal help desk scenarios, this includes screen sharing from the caller’s side. If someone calls your support queue from within your organization, they can show you exactly what they’re seeing.
Contact details now display the time zone of the person you’re looking up, shown as hours ahead or behind your own. Small detail, meaningful when your team works across regions. (see screenshot above for an example)
Typing a number into Attendant Console now searches the Microsoft directory for a matching user. If there’s a match, you get the option to reach them via a Microsoft Teams call rather than a standard phone call.
A microphone level indicator now appears in the footer during calls and in device settings. You can confirm your mic is picking up sound without leaving the console or asking the caller to repeat themselves.
Agents can now sign in and out of Microsoft Teams native call queues directly from Attendant Console. Previously, that required going to Microsoft Teams or Contact Center separately.
Footer items are now icons with tooltips instead of text labels. The admin-enforced column in settings only appears when there’s something to show. Dropdowns, loading indicators, and panel behavior on smaller screens have all been cleaned up.
If you would like to read the full list of improvements and updates, read the here.
When Attendant Console is used as a Contact Center agent, view your current agent status, time in status, and signed-in queue-count in the footer. Click any item for more detailed information without leaving the workspace.
Save multiple workspace layouts and switch between them with one click from the footer. Configure layouts for different tasks (e.g. active calls, queue monitoring, administrative work) and change between them efficiently.
Access Queues and Search Results as temporary overlays when needed. These panels appear only when relevant, preserving your workspace layout, while providing important information.
Configure which contact types appear in search results (e.g. internal users or external contacts), so you can reduce irrelevant results and locate the right contacts faster.
Connect your own Azure AI model to Attendant Console. All AI features will use that model with existing security and compliance configurations.
Requires Azure setup and permissions from IT.
Teams-matched dropdowns keep the user experience consistent with Teams.
Empty panel descriptions help new users understand panel functionality when empty.
Improved narrow Queues panel displays cleanly with text truncation and repositioned sign-in toggles.
Dedicated AI Settings tab consolidates all AI configuration in one location.
If you would like to read the full list of improvements and updates, read the here.
Teams contacts and categories now sync directly into Attendant Console, pulled from the Teams People app.
Live speech-to-text now works in multiple languages, with the ability to switch automatically per call. Whether you’re supporting international students, global business contacts, or diverse community members, every conversation gets transcribed for sentiment analysis, quality assurance, and AI applications.
Group voicemails from M365 now appear directly in Attendant Console. Reception staff can monitor departmental mailboxes and team inboxes without switching applications.
New Quick Access Shortcuts let receptionists toggle between custom layouts with one keyboard sequence. Set up a streamlined view for handling incoming calls during rush periods, then switch to an expanded layout with more detail panels during wrap-up time.
People Search (which was previously behind a feature flag) searches across Active Directory, personal Exchange contacts, global Exchange contacts, and even people you’ve chatted or emailed with and it’s now GA.
A new calendar button provides one-click access to any contact’s schedule directly from the contact layout. Reception staff can verify availability before transferring which provides various benefits such as fewer dropped transfers and better first-call resolution.
If you would like to read the full list of improvements and updates, read the here.
In call transcripts, you’ll now see a star (*) next to anything the Attendant Console user said. This makes it much easier to follow conversations and understand who said what, especially when used with AI to analyze calls.
You can now make outbound calls using your queue’s phone number instead of your personal Teams number. This keeps your personal contact information private and maintains a professional appearance for all business calls.
When performing various Attendant Console actions, you’ll see a small notification at the bottom of your screen confirming the action was completed. No more wondering if your changes went through, or unknowingly making an incorrect change.
The following actions will show an alert:
A user is added to a group
A user is removed from a group
An AI prompt response is copied
Any info on the contact details panel is copied (email, department, etc.)
Listening to a voicemail and need to call back? Just click the call button next to each voicemail message instead of writing down numbers or searching for contacts.
We’ve made the console more accessible by improving keyboard navigation. Blind or visually impaired users, or anyone who relies on the tab key to move around the screen will find it much easier to get where they need to go.
Your call history now displays the exact time each call took place, not just the date.
When transferring a call, the person receiving it gets an AI-generated summary of what was discussed. Callers won’t have to repeat their story, and agents can jump right into solving their problem.
When either the caller or the Attendant Console user mentions a name during a call in the context of speaking with them, contact cards for people with that name automatically appear.
For example, a caller mentions “I think I spoke with someone there name Adele” – Adele’s contact information pops up, ready for an instant transfer.
Since this is a private preview feature, and not turned on by default, please if you are interested in using it.
In the case that you can’t remember who you talked to about a specific topic, you can now search through your contact notes to find the right person and conversation.
New users of Landis Attendant Console will benefit from the feature highlights menu, which helps you discover and learn about important capabilities you might not know about.
For companies using both Landis Attendant Console and Landis Contact Center, we’ve added quick shortcuts to:
Change your agent status
Sign in or out of specific queues
Sign in or out of all queues at once
Turn call recording on or off
You can also see your call recording status right in the footer, so you always know if recording is active.
If you would like to read the full list of improvements and updates, read the here.
Working from home? Between meetings? You can now update your Microsoft Teams status message directly from Attendant Console using custom shortcuts.
If you use both and Attendant Console, becomes more accessible. When your policy allows, you can start and stop recordings directly from the Attendant Console interface.
No longer is it necessary to jump between applications or purchase separate recording licenses.
Visibility settings for the recently added “transfer to current call” button let you hide the option if you don’t frequently use it.
Call pop information gets an upgrade with adaptive cards. As a call comes in, you can now display and interact with data-rich, customizable cards.
Examples might be customer history, account status, previous interactions, or other info that might help you provide better service when you answer.
A new webhook allows you to send useful call information such as transcripts, caller details, or AI responses to your designated endpoint when calls finish.
This gives options for deeper analysis, contact management integration, and custom reporting.
The layout system gives you more control over how your workspace looks and functions. You can now create and save multiple custom layouts for different situations. For example, one for active calling, another for after-hours, or other specific configurations for different team members.
Instead of searching for contact information or manually dialing numbers, you can call back directly from your history with a single click.
If you would like to read the full list of improvements and updates, read the here.
The connection between Landis Attendant Console and Landis Contact Center just got better! Here’s what’s new.
We’ve streamlined the sign-in process with a simple checkbox in Settings > Connectors. Once you check the box, select your tenant (if you have multiple), and you’re connected. You no longer need to sign in a second time to use this integration.
Call pop functionality configured in Landis Contact Center now also works in Attendant Console. When a call comes in through a Contact Center queue, the call pop will display in Attendant Console automatically based on your Contact Center settings. No additional configuration is needed in Attendant Console.
We’ve added a dedicated panel for wrap-up questions in the layout options. When a call from a queue ends, the wrap-up questions appear just like they would in the Contact Center agent panel, complete with a countdown timer.
Now you can make calls on behalf of others with the delegate features:
With the new optional CallDelegation.ReadWrite permission, you can now place outbound calls on behalf of someone who has set you as their delegate. A dropdown will appear under your profile photo where you can select the party for whom you want to make calls.
We’ve added the ability to create Quick Access Shortcuts to switch who you’re placing outbound calls on behalf of.
The calendar on contact details now shows five business days instead of three.
Administrators now have more control with item-level enforcement for list-type settings. Instead of enforcing an entire list of settings, admins can now choose specific items within a list to enforce while allowing users to modify other items or add their own. This works for:
Search sources
Contact groups
Keyboard shortcuts
Quick access shortcuts
Now you can add richer, more interactive experiences to your AI prompts with adaptive cards. When you include a valid adaptive card template in your prompt settings, and the AI model returns a valid JSON object, we’ll populate the adaptive card with the data and display the result.
This opens up the possibility to create custom interfaces for AI responses, such as parts lookup, inventory details, or customer information cards.
We’ve added official support for transferring calls directly to voicemail, removing the experimental checkbox that was previously required. This feature uses Microsoft’s official APIs for a more reliable experience.
Additionally, we’ve added a new checkbox for “transfer to voicemail” on call user Quick Access Shortcuts, making it even easier to send calls directly to voicemail.
The footer has been redesigned to show more useful information at a glance.
You can customize which items appear and drag and drop them to your preferred order.
Transfer type and mode
Audio devices in use
User status and presence
Selected delegator (who you’re making calls as)
We’ve added Microsoft’s search endpoint capability under private preview as this is still in testing. This allows for fuzzy search (handling misspellings or partial matches) of contacts across multiple sources:
Active Directory users
Exchange contacts
Global Exchange contacts
“Implicit” contacts (people you’ve interacted with)
If you would like to read the full list of improvements and updates, read the here.
A new call history panel allows users to quickly review past interactions, making it easier to track important calls.
Contact notes and call transcriptions now appear directly in the call history. This history is stored locally in the browser, which means that only calls made or received from that device appear here.
New triggers now allow automatic running of AI prompts. These can be set to run at the end of a call or with a custom keyboard shortcut.
These responses can be saved in the local call history (mentioned earlier). Prompts that are currently in use, (e.g., in callback reminders) cannot be deleted.
In the unlikely case of using Azure OpenAI too heavily, a warning will be displayed to keep use of the AI from getting throttled.
Agent status changes from Contact Center are now automatically saved instead of manually refreshed.
The time that an agent has been in the current status is also displayed.
A new “Transfer” button to complete a consult transfer now makes it more intuitive. Before, users had to click the consult transfer button twice: once to consult the agent possibly taking the call, and a second time to connect the caller to that agent. Now, if you wish to use the new function, a “Transfer” button finishes the transfer with one click.
To prevent accidentally deleting policies, managers are now asked to confirm whether or not they would like to proceed with the deletion.
Fixed PSTN Call Issues: Users can now add a PSTN participant to an existing PSTN call.
Improved Audio Alerts: Ring sounds now play on the selected audio device instead of the Windows default.
Miscellaneous UI improvements.
If you would like to read the full list of improvements and updates, read the here.
We’ve added a customizable AI Prompts feature you can start using today! These prompts are applied to live call transcripts and are great for:
Call summaries: Provide concise recaps for callback reminders and chat consult transfers.
Action lists: Automatically identify tasks, names, or part numbers from conversations.
Coaching hints: Check if agents are following guidelines during calls.
And more! There are as many use cases as you create prompts for.
(Note: Real-Time Speech to Text must be enabled to use this feature.)
Create your AI prompt in Settings. This prompt and the live call transcript will be sent to the AI provider.
There are 2 ways that Ai prompts can currently be used:
1. AI Prompts for Callback Reminders and chat consult transfers: Automatically add helpful details, like the call summary, to callback reminders or chat transfers—providing context without extra work for the agent. Here's an example of an AI prompt adding a summary to a chat callback reminder.
(You can customize the text of the callback request in Settings > Transfer under the Call Back Messages section. Use the Add button at the end of the field to insert your AI prompts and other variables into your message template.)
2. AI prompts in Call Details can be run on demand. The generated result can be copied to your clipboard with one click to make it easy to use elsewhere. See the for some examples.
Added Help, What's New, and Feedback options to the title bar context menu.
Hold Time Alerts: Set custom warning and critical time thresholds for calls. Optionally you can receive audible alerts when critical time is reached, ensuring agents leave no calls unattended.
Failed Transfer Alerts: Configure warning and critical time settings for failed transfers. Optional audible alerts, triggered alongside visual cues, help prevent important calls from being dropped.
Option to open tel: links by default: When set as the default, phone number links will open Attendant Console and search the phone number, making it easy to start outbound calls within the app.
Persistent Window Settings: The application now remembers its window size and position when closing and restores these settings when relaunched.
Shared Notes: You can now easily sync and share notes with other users by using a shared key.
Display notes on contact: Notes can now be added directly to the contact layout, allowing agents to view important information without needing to click into each contact. See the example layout below:
Sign in or out of Landis Contact Center queues without leaving Attendant Console! You can also update your status from the same panel.
Manage the connection to your Contact Center organization in Settings > Connectors.
Add and Remove a Contact from Groups using the right-click menu on the Contact. This works for all types of contacts, including Exchange and Global Exchange.
Create a New Contact Group directly from the "Add to Contact Group" menu—no need to go to settings to set up a group.
Custom Teams Status Messages: Users can now set or edit their status messages, which automatically sync with the Teams app—no need to open the Teams app separately to update your status!
New Setting: You now have the option to automatically clear the search box after a call is successfully transferred.
Call Details Panel: This new panel displays details about the current call. It currently includes two tabs:
Caller Details: Shows caller information and the contact's notes field.
Real-Time Speech-to-Text: Displays live captions, which allow for advanced AI interactions.
Transfer holding call to current call. This enables agents to merge calls and automatically disconnecting themselves.
Example use case: An agent calls someone on behalf of their manager. Once the recipient picks up, the agent places the call on hold, calls the manager, and then transfers the held call to the current call, disconnecting automatically.
Screen readers now read all three lines of contact text, enabling agents using screen readers to hear notes or secondary details, along with the contact name, when reviewing contact lists.
Using a Quick Access Shortcut (QAS) to change/set your presence when a duration is set.
Using a QAS to change your audio devices
Using a QAS to change your audio devices, but the device(s) is unavailable
Normalization rules


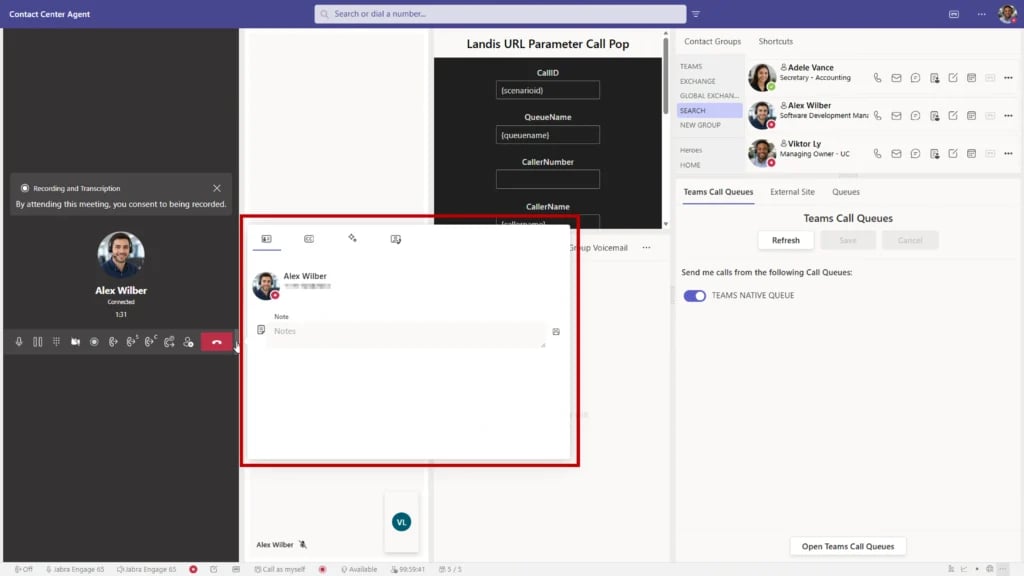
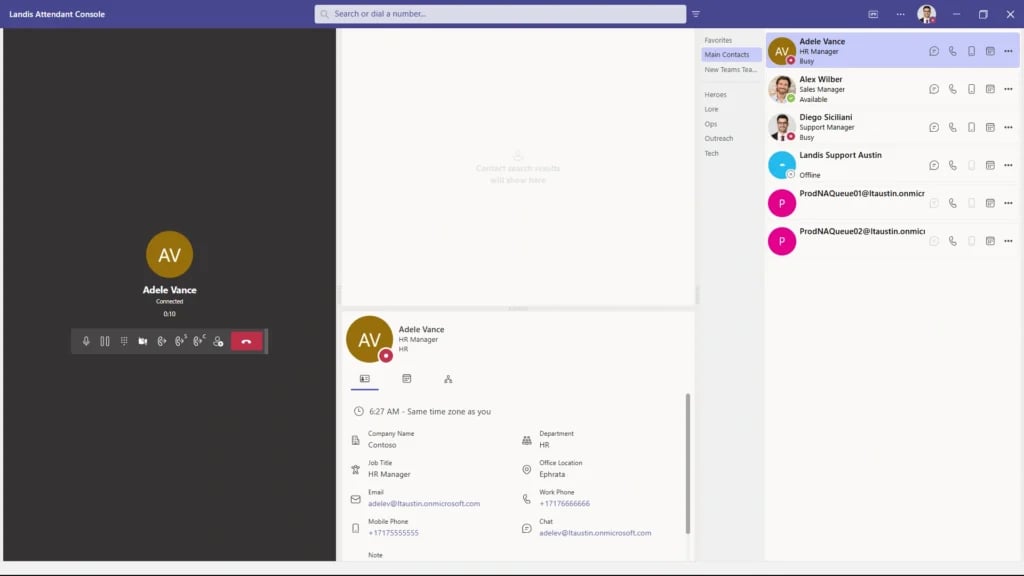
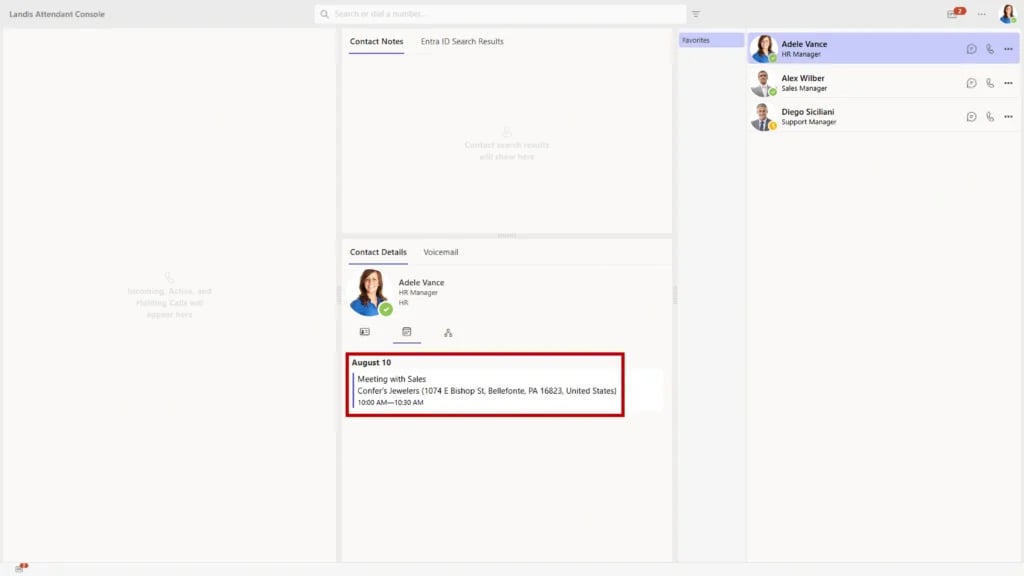
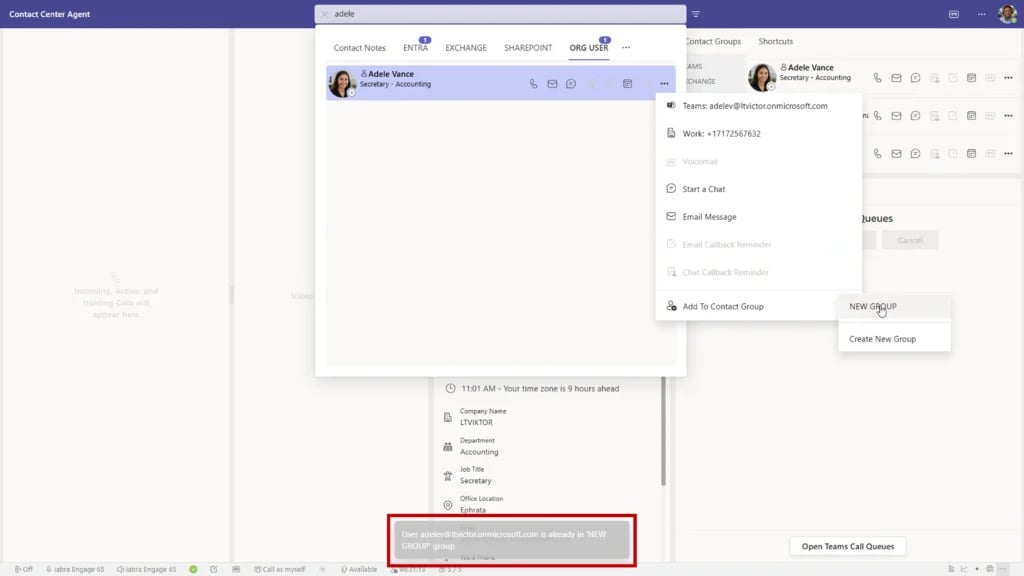
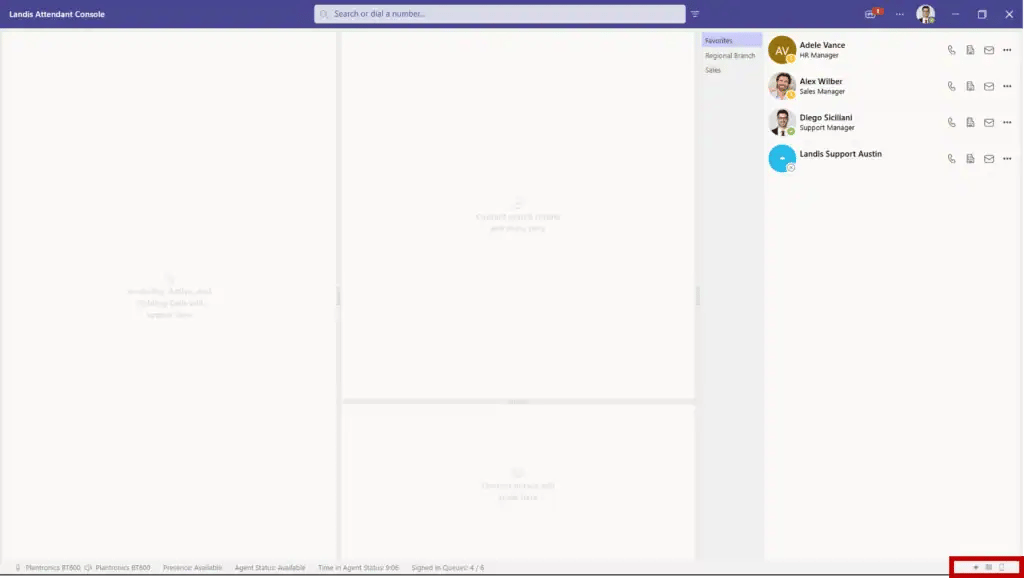
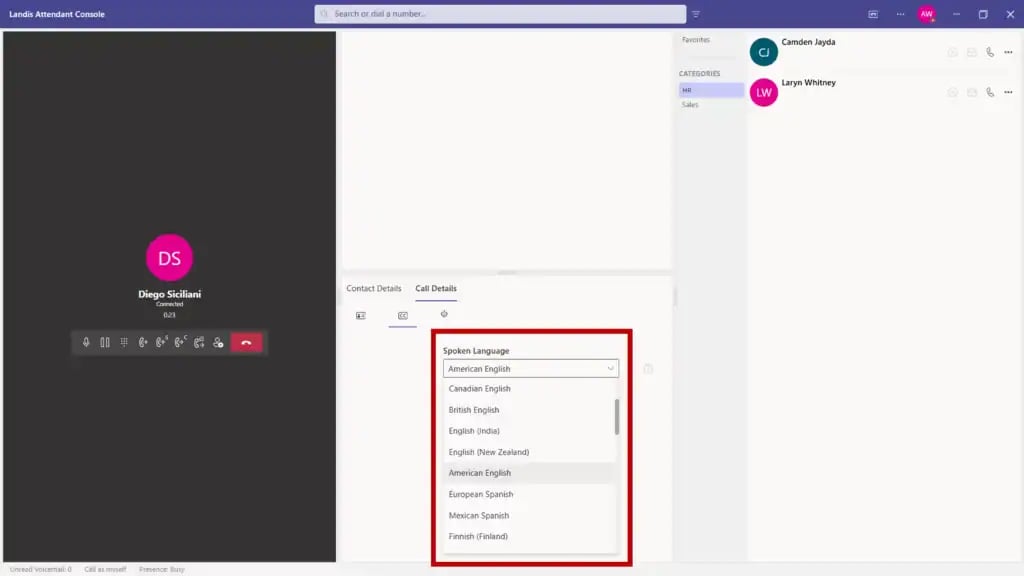
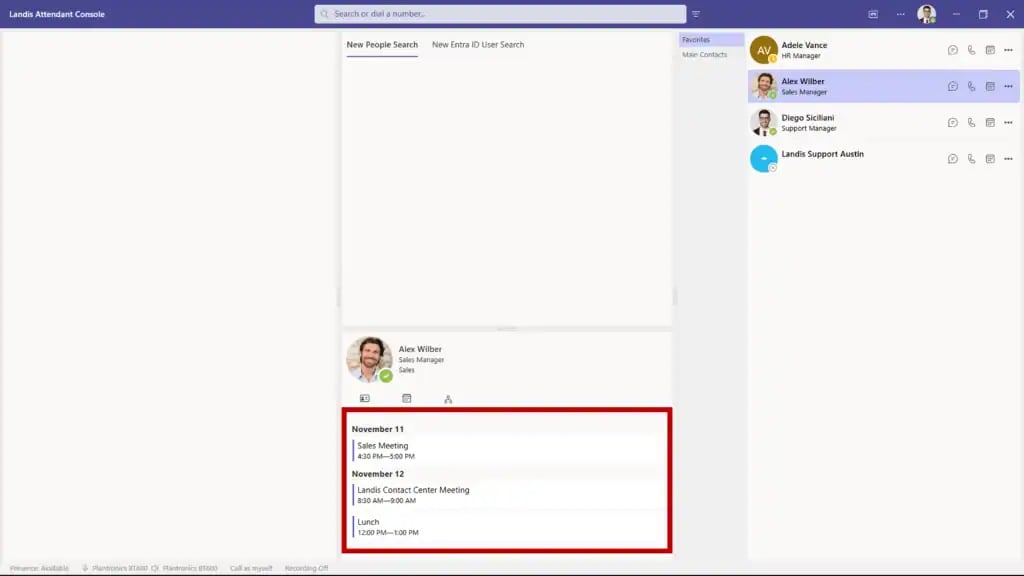
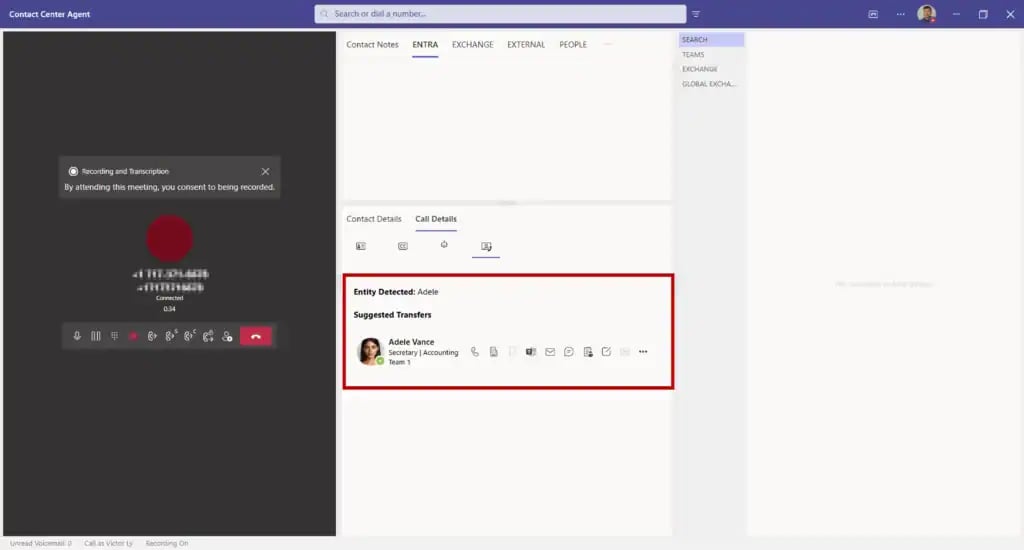
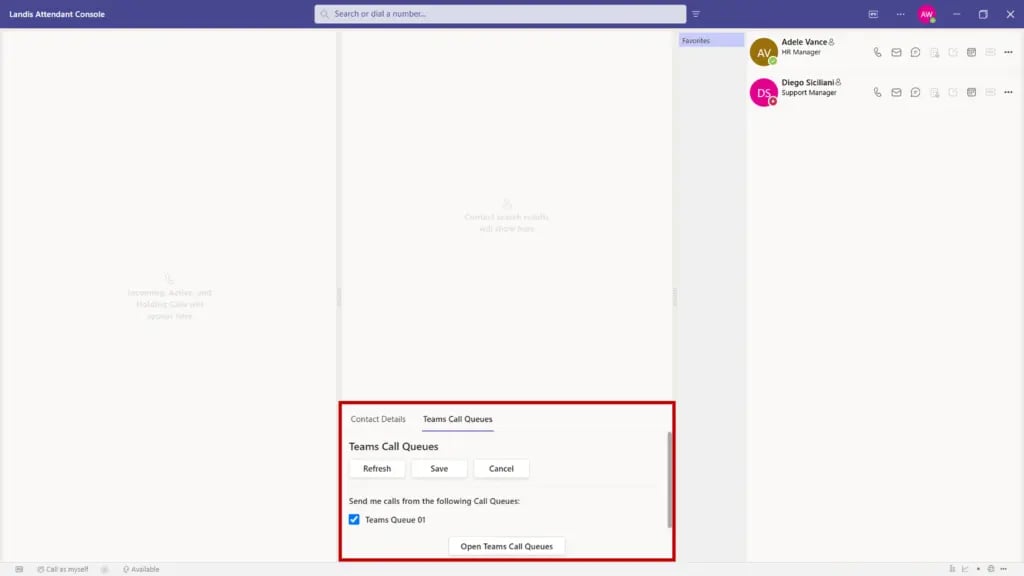
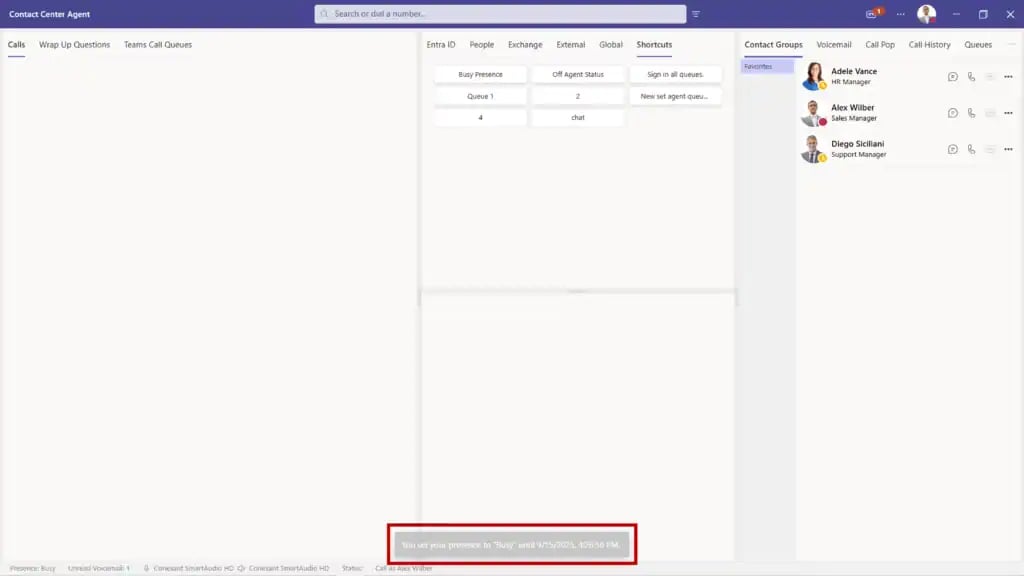
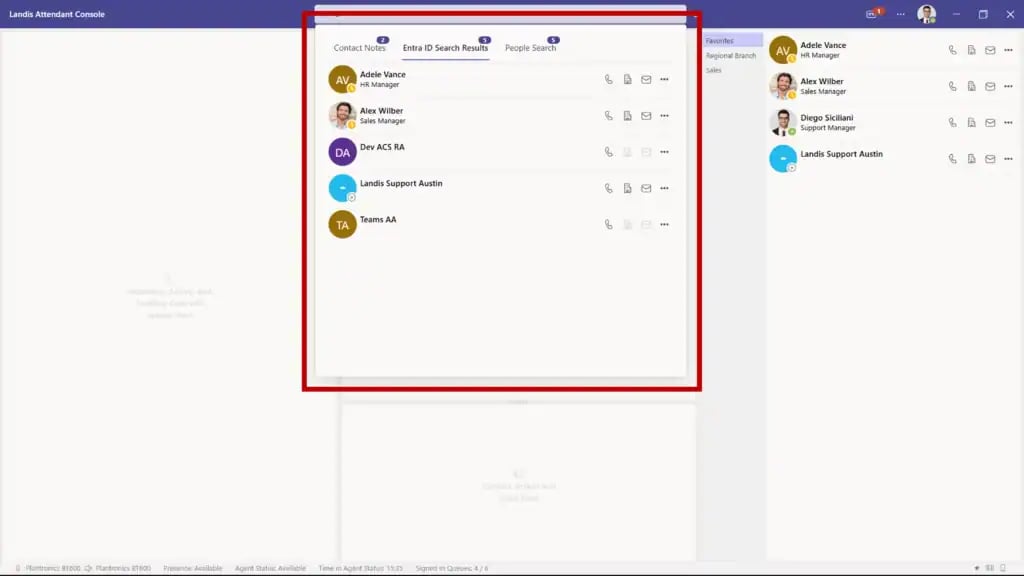
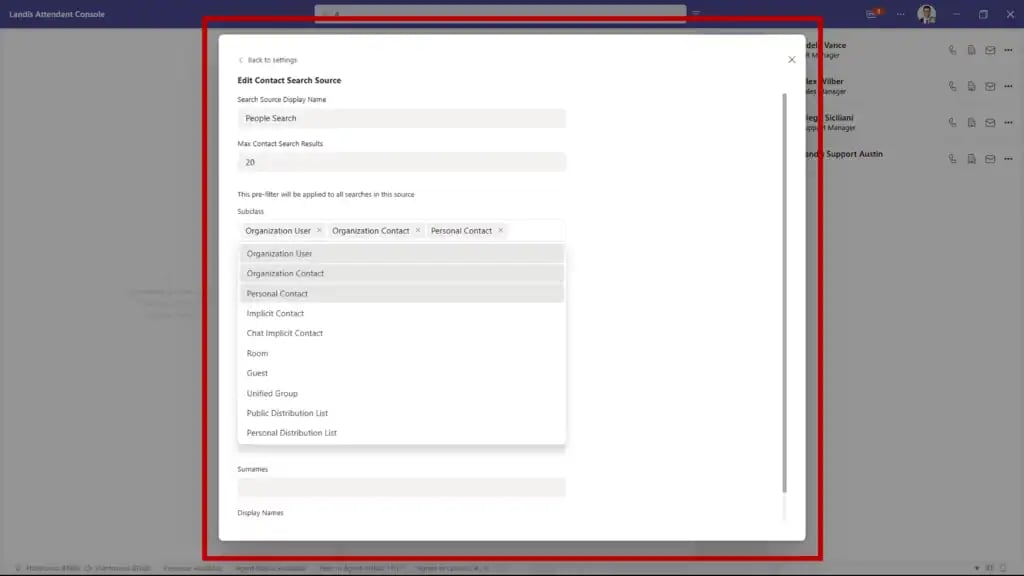
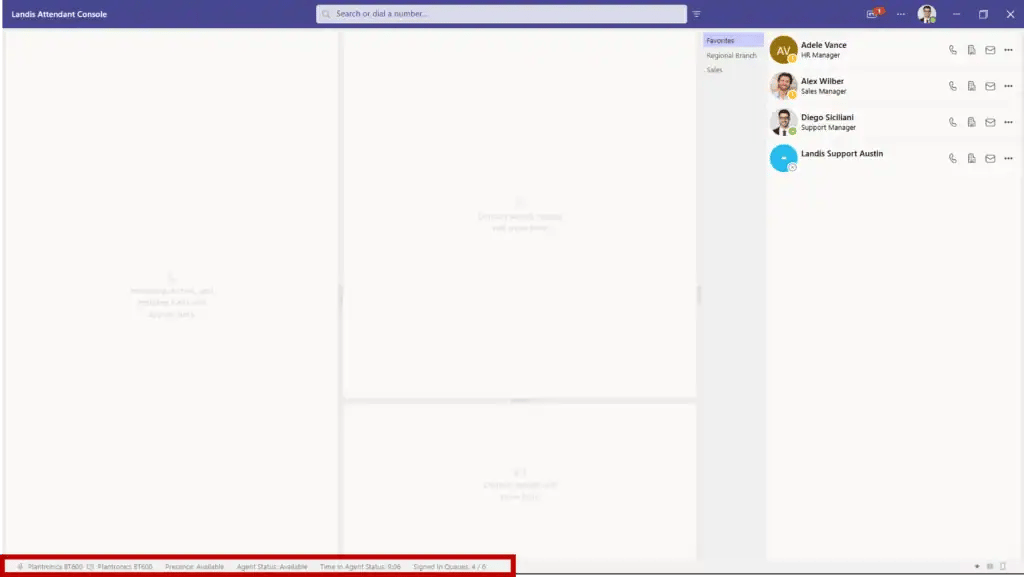
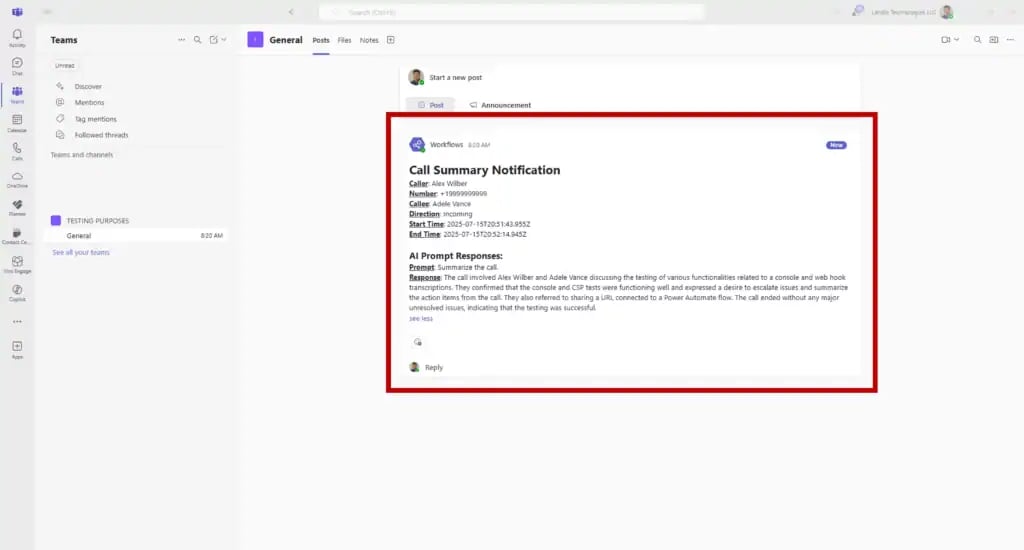
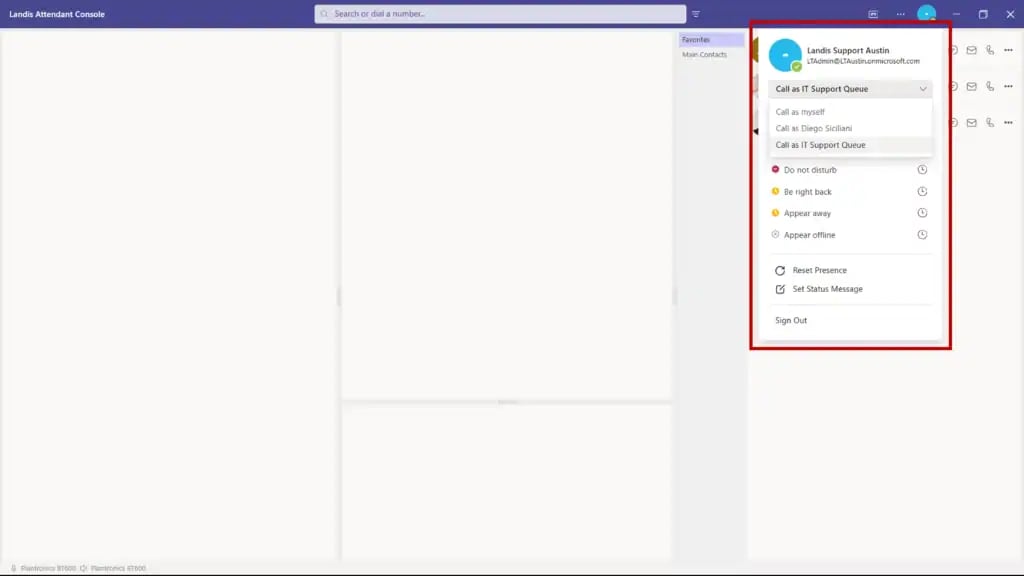
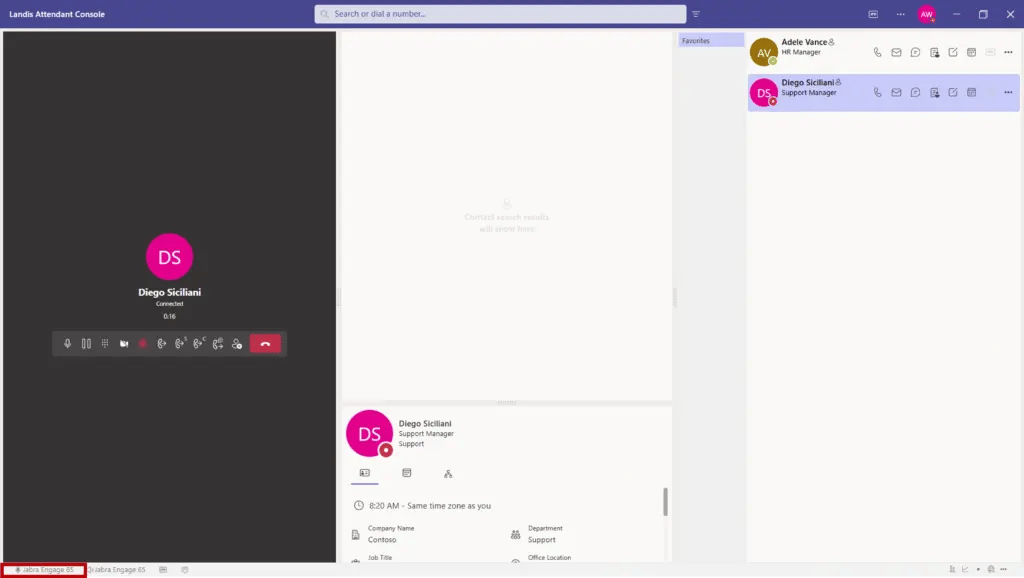
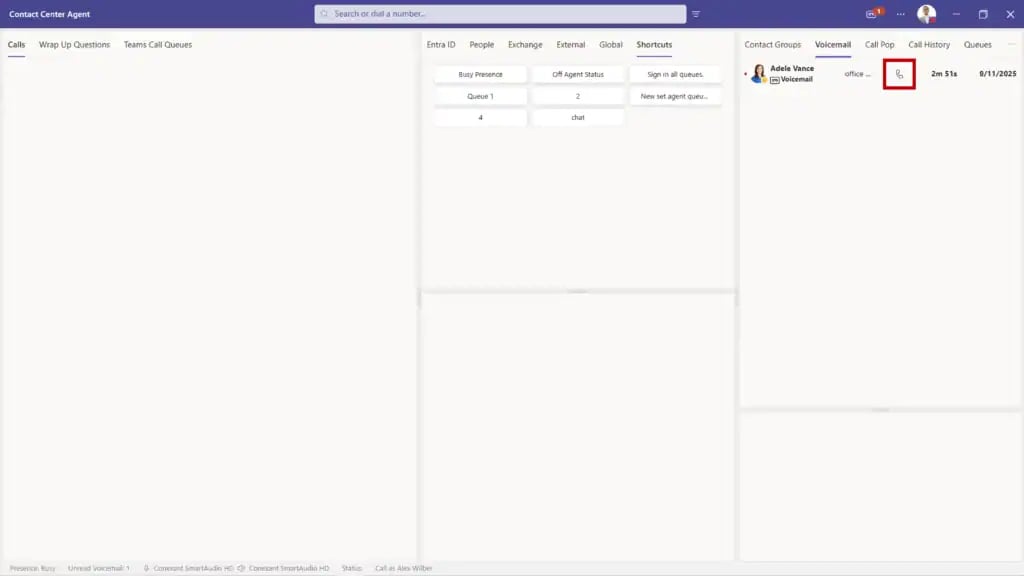
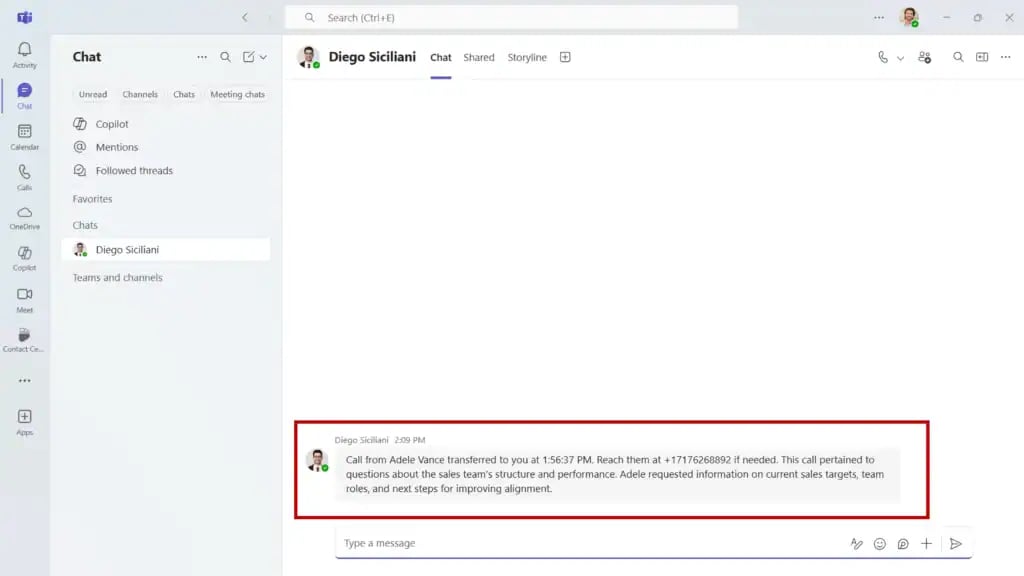
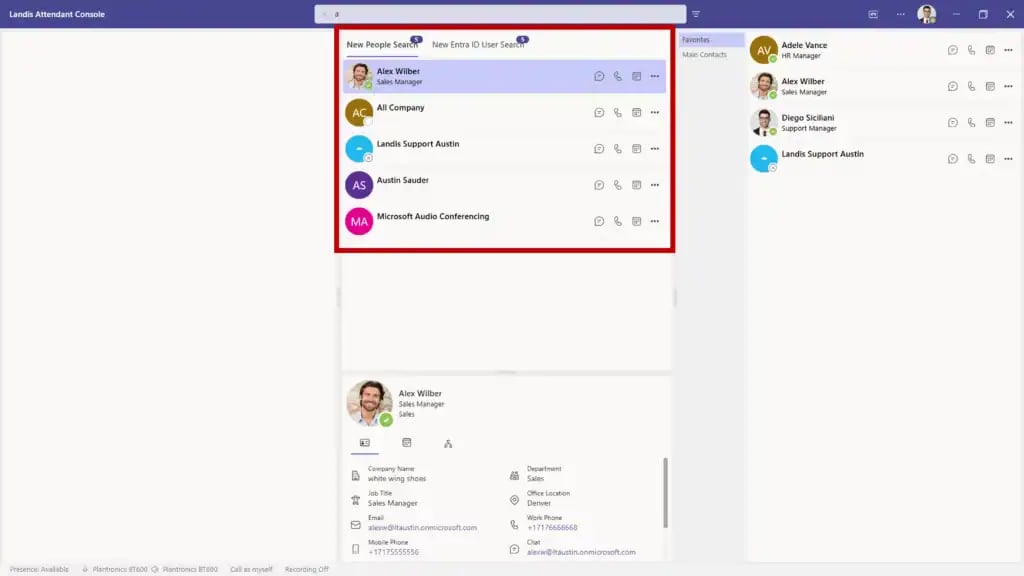
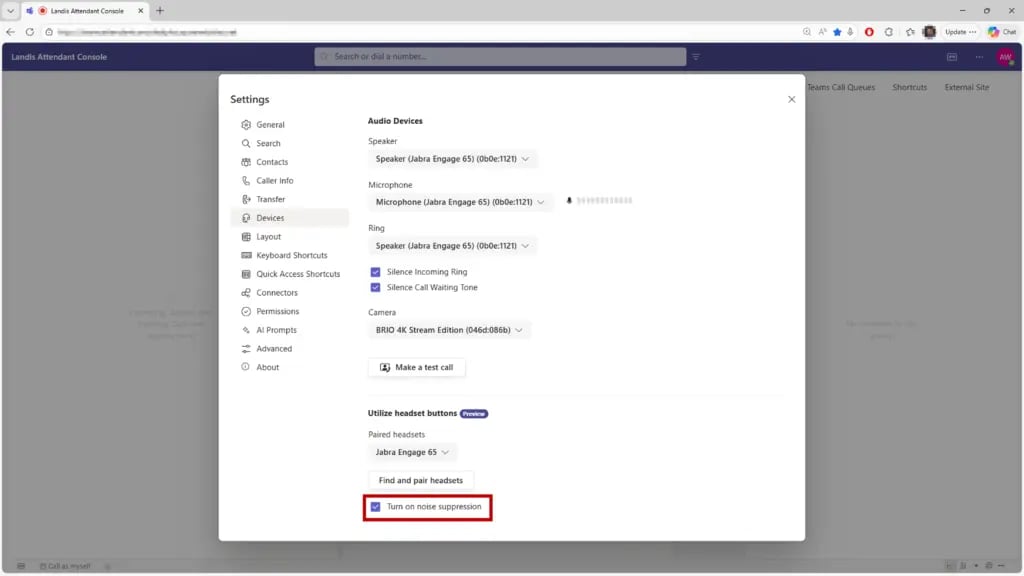
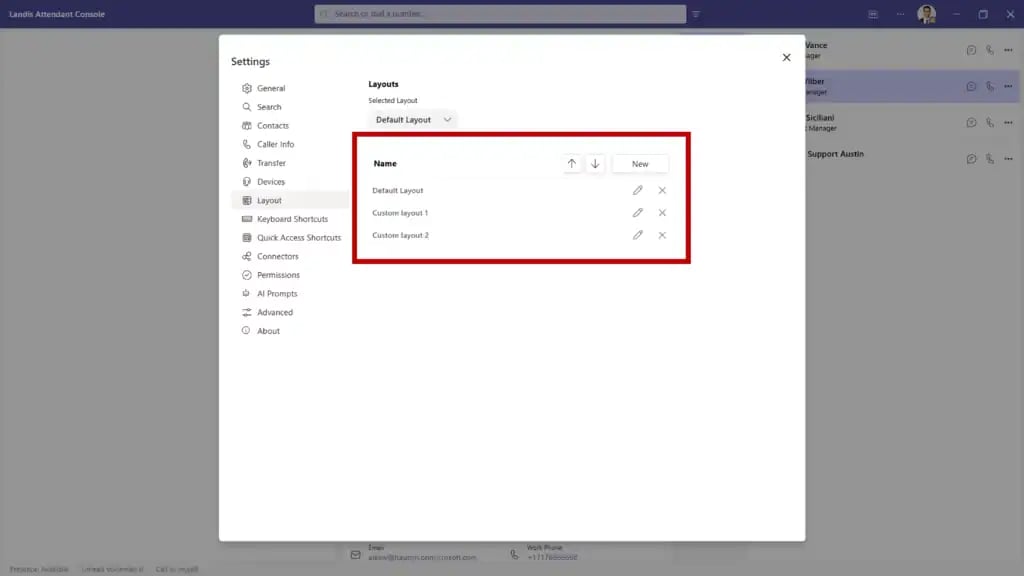
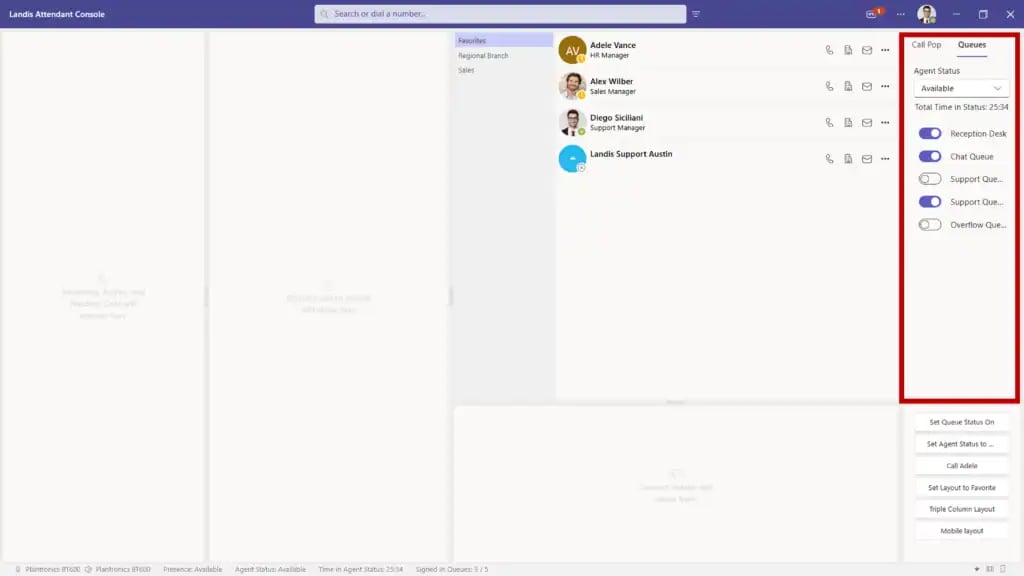
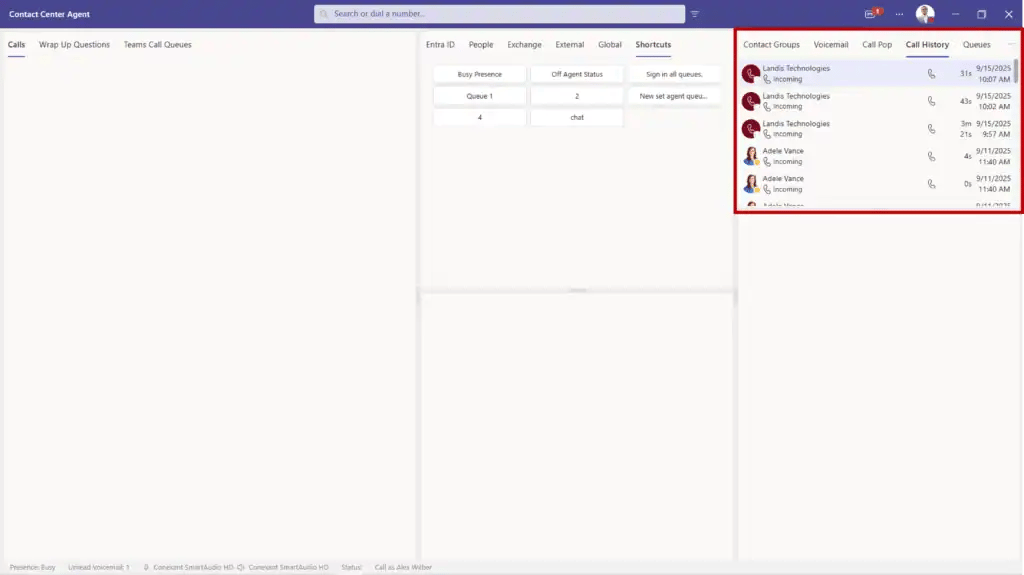
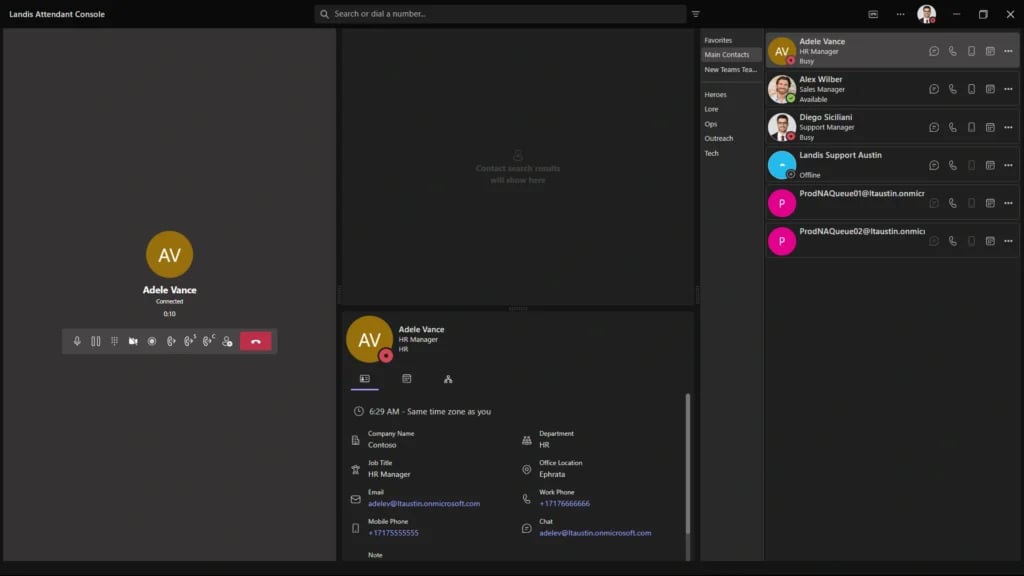
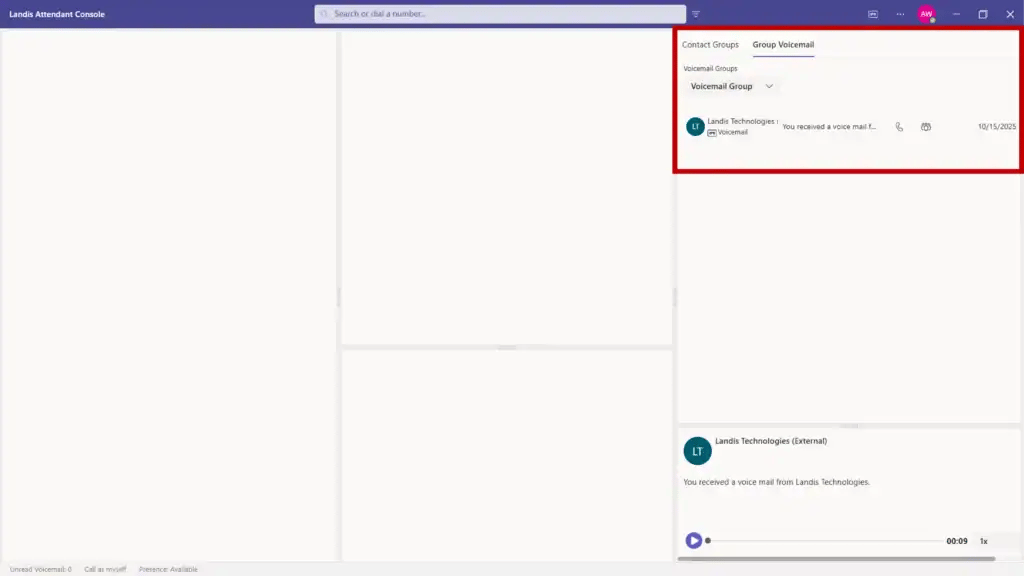
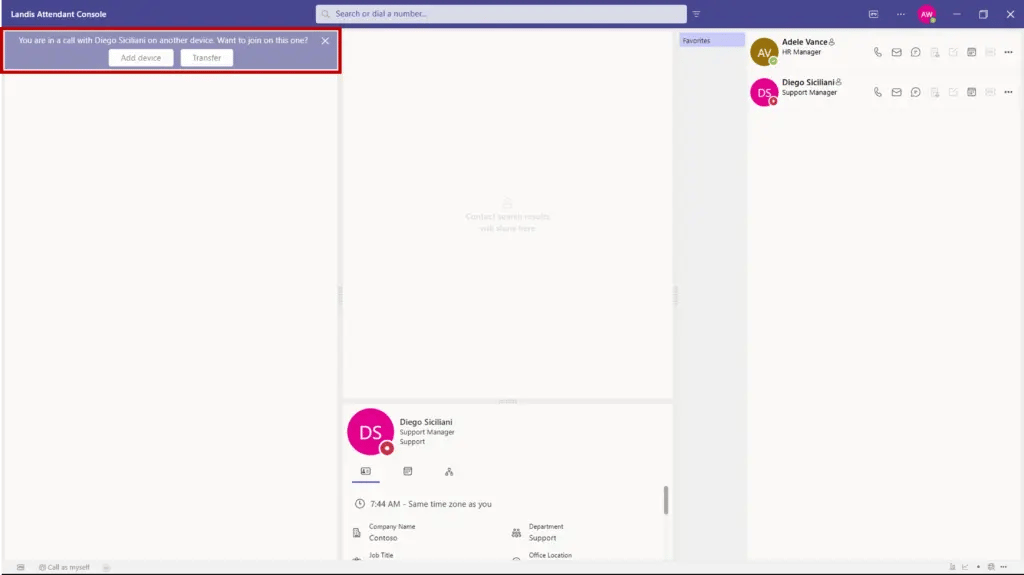
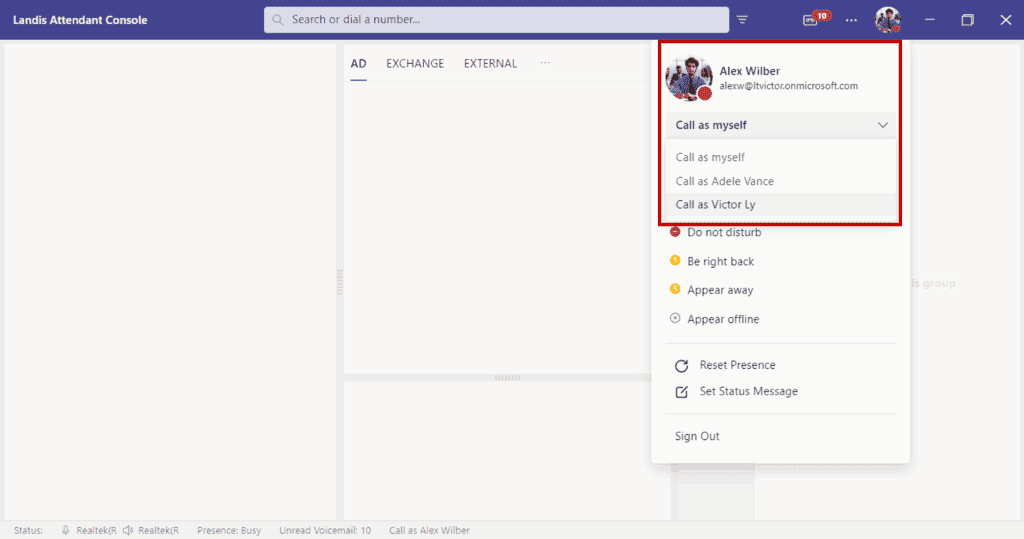
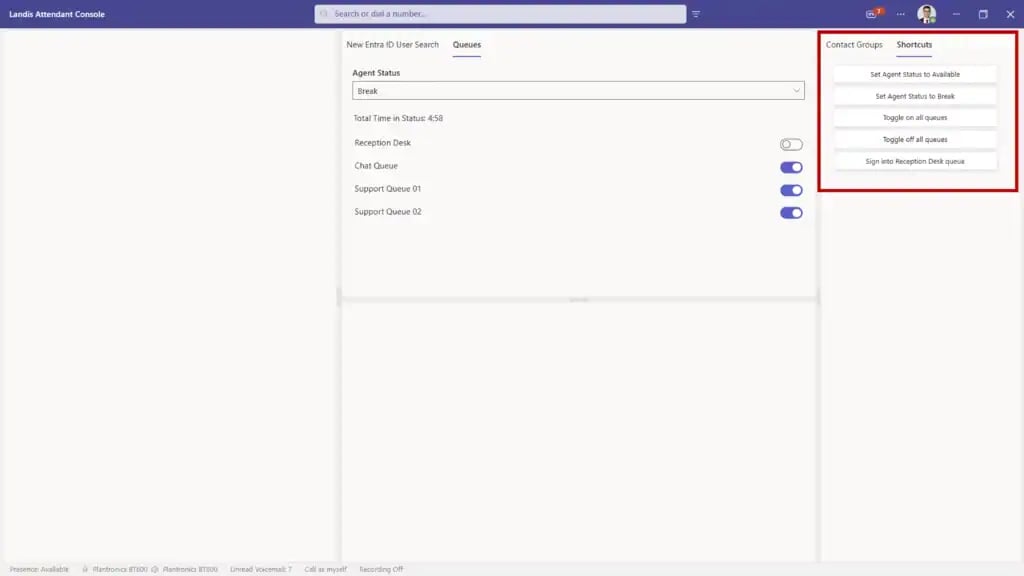
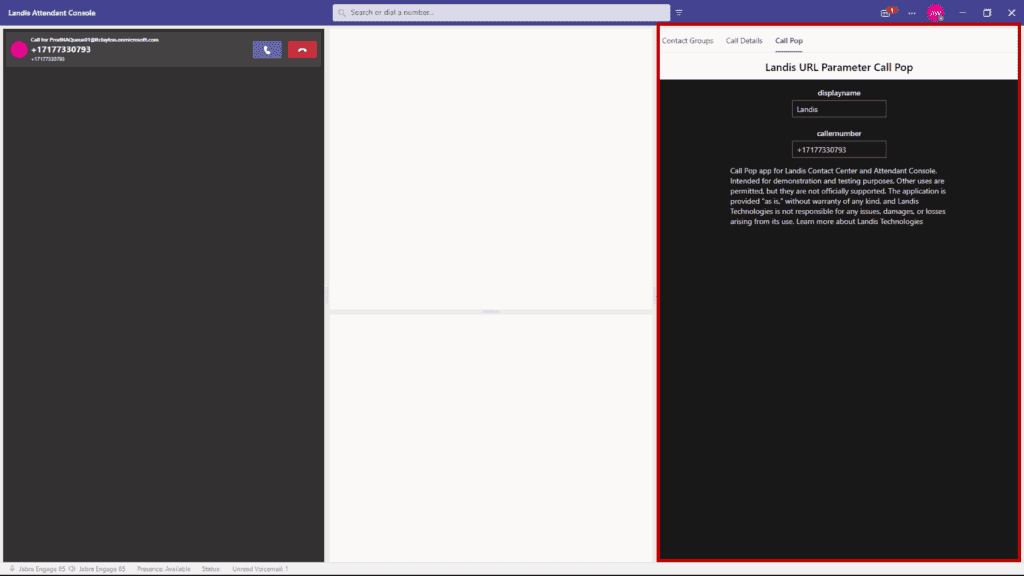
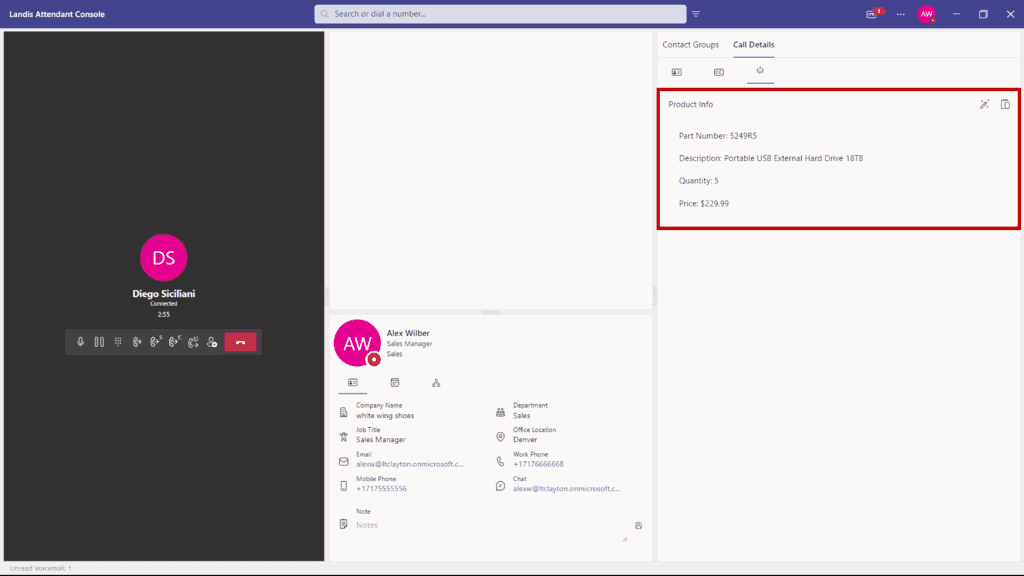
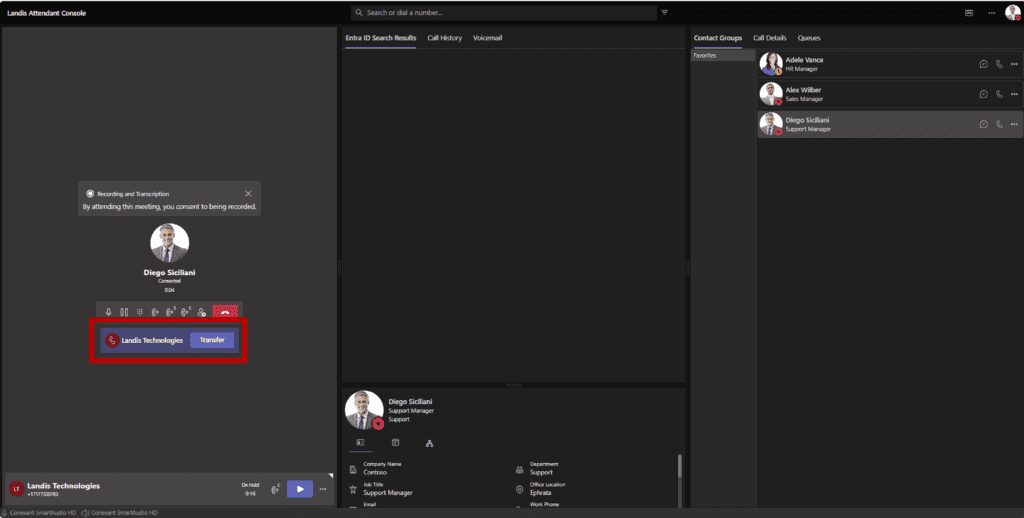
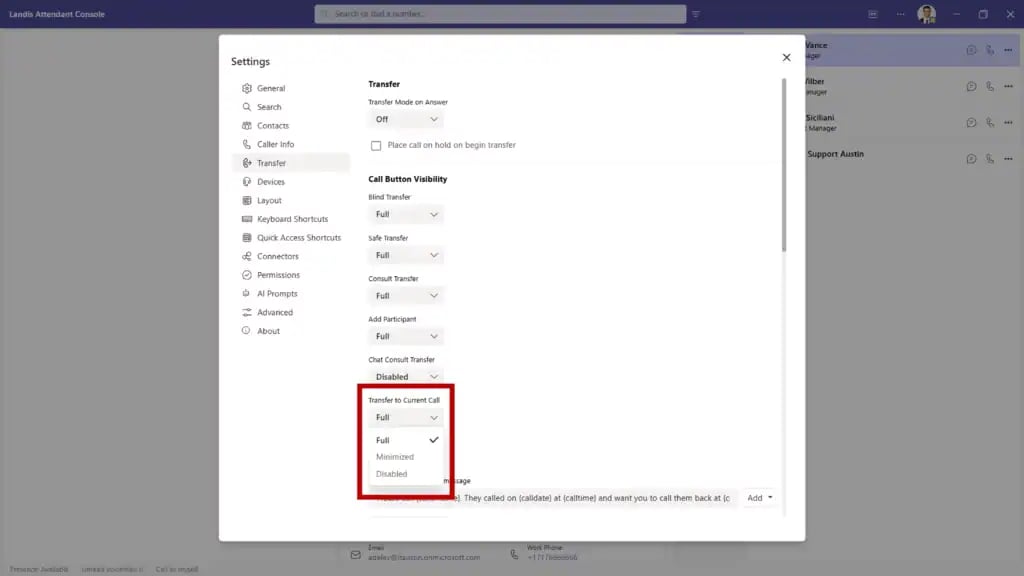
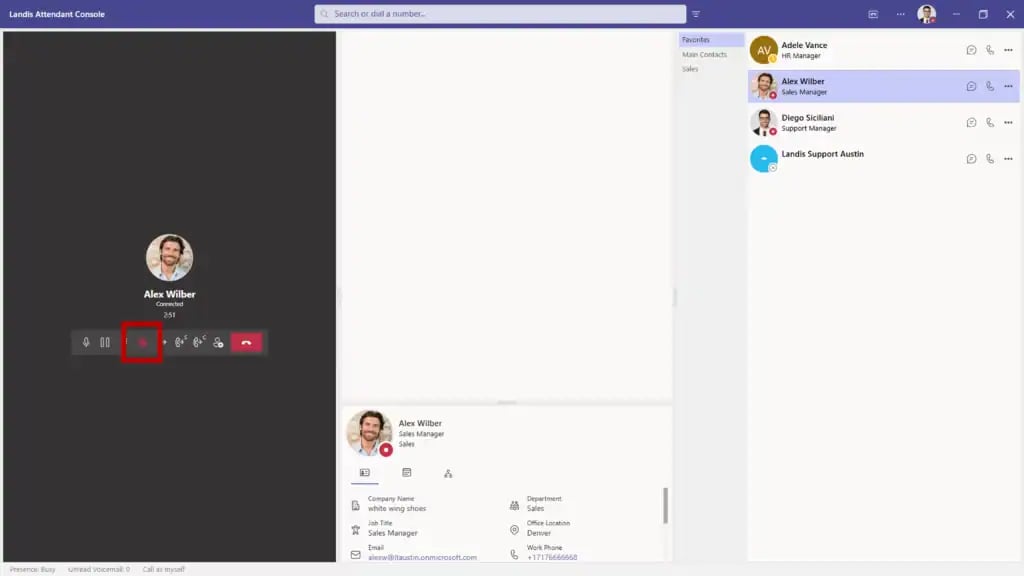
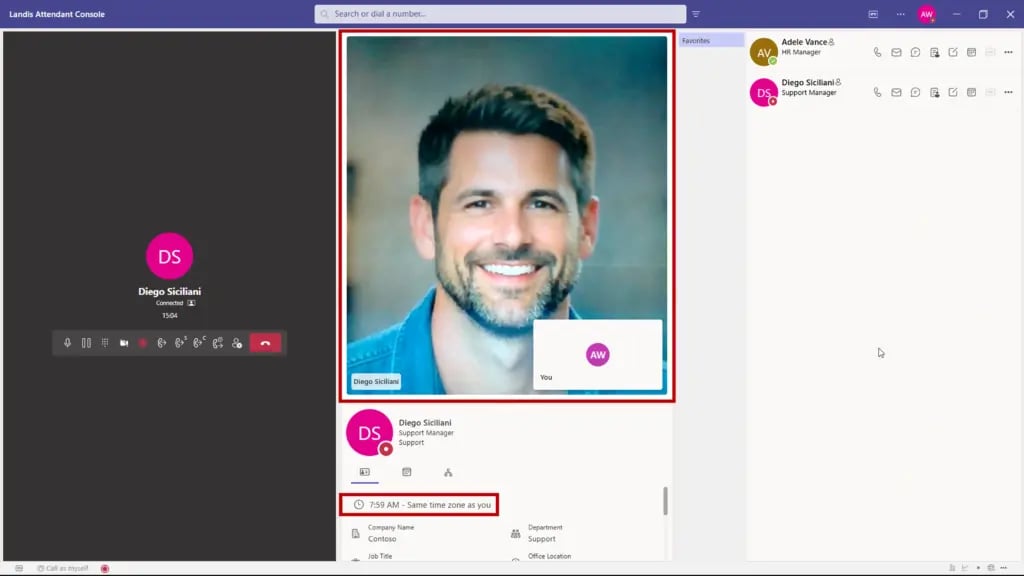
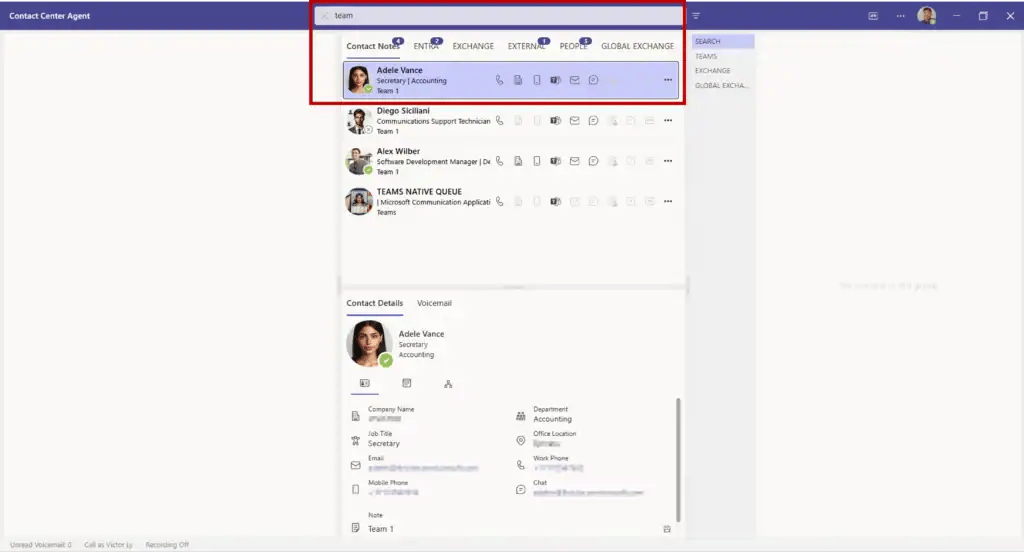
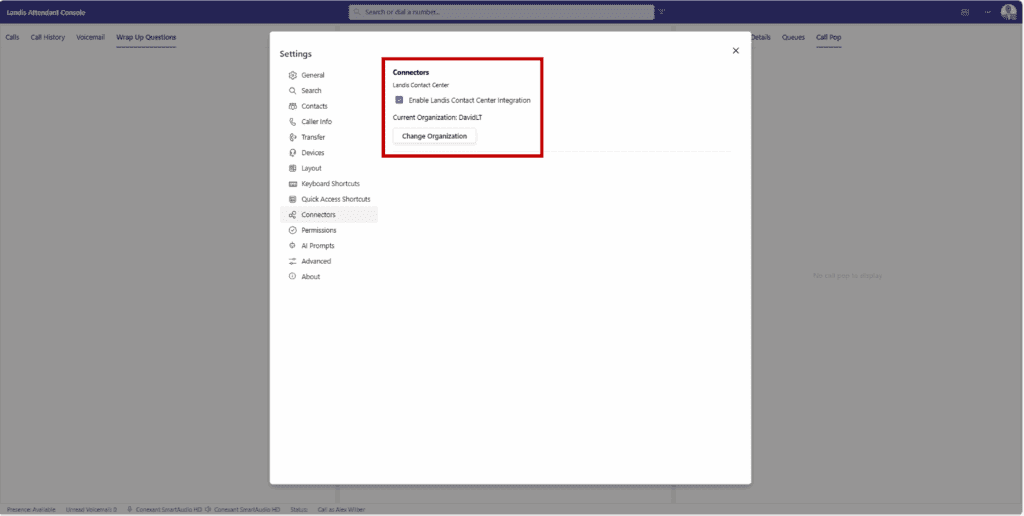
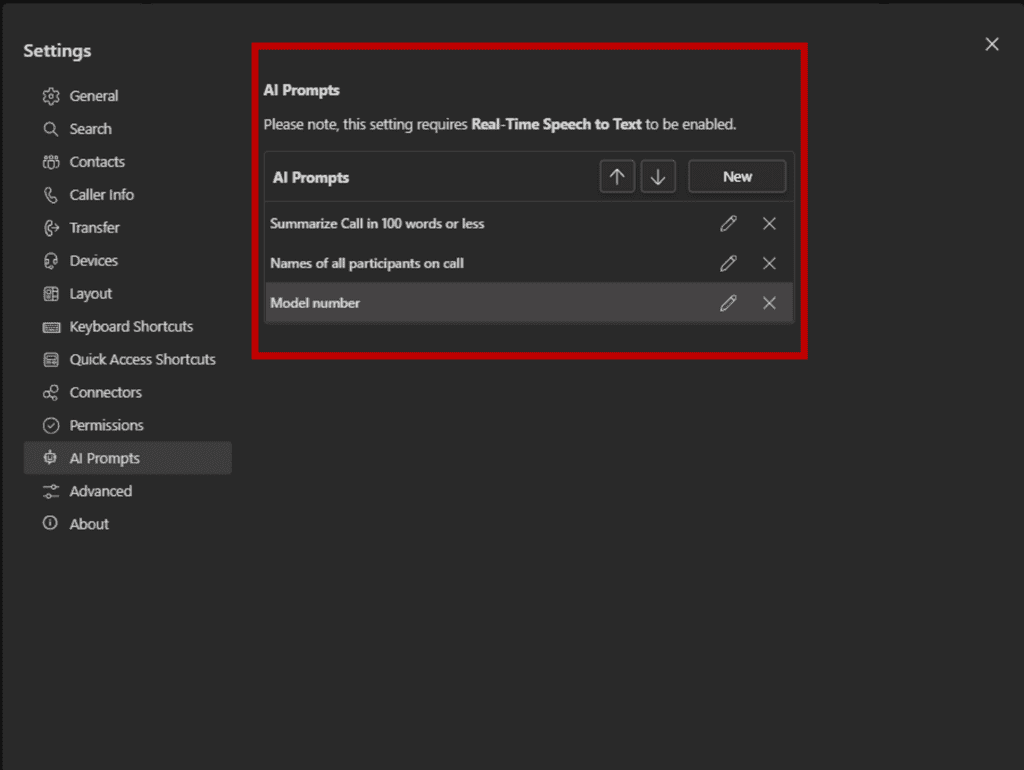
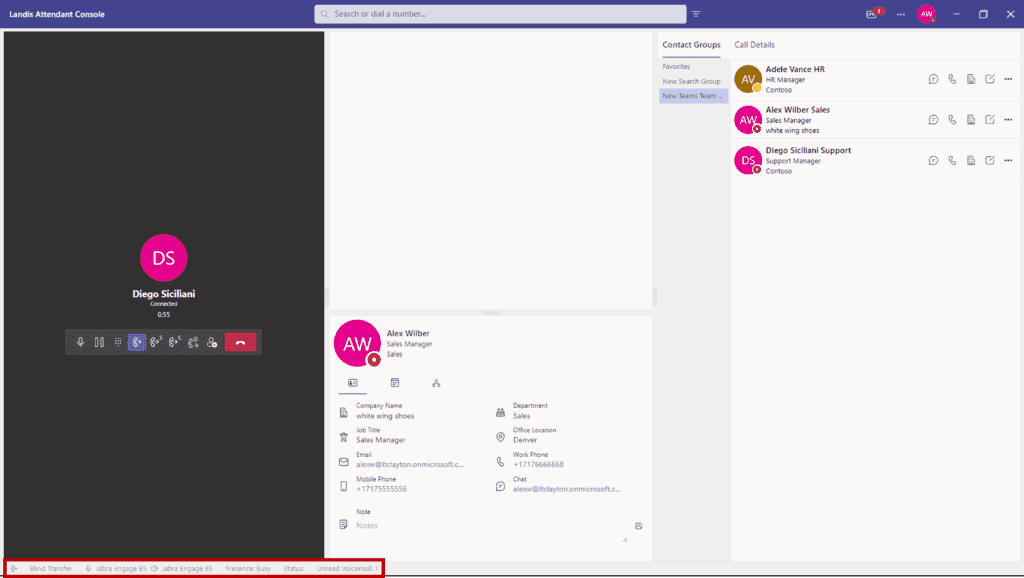
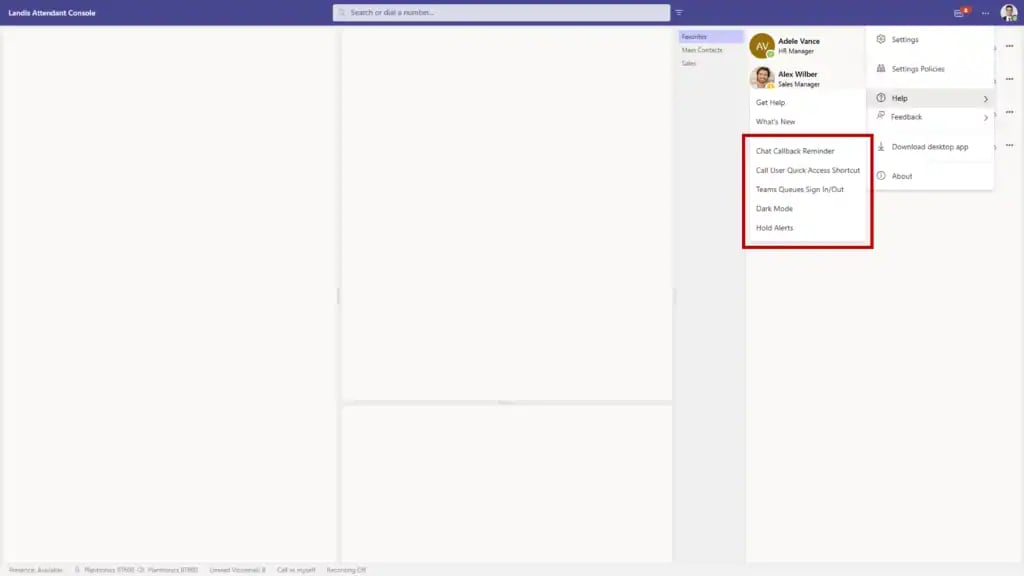
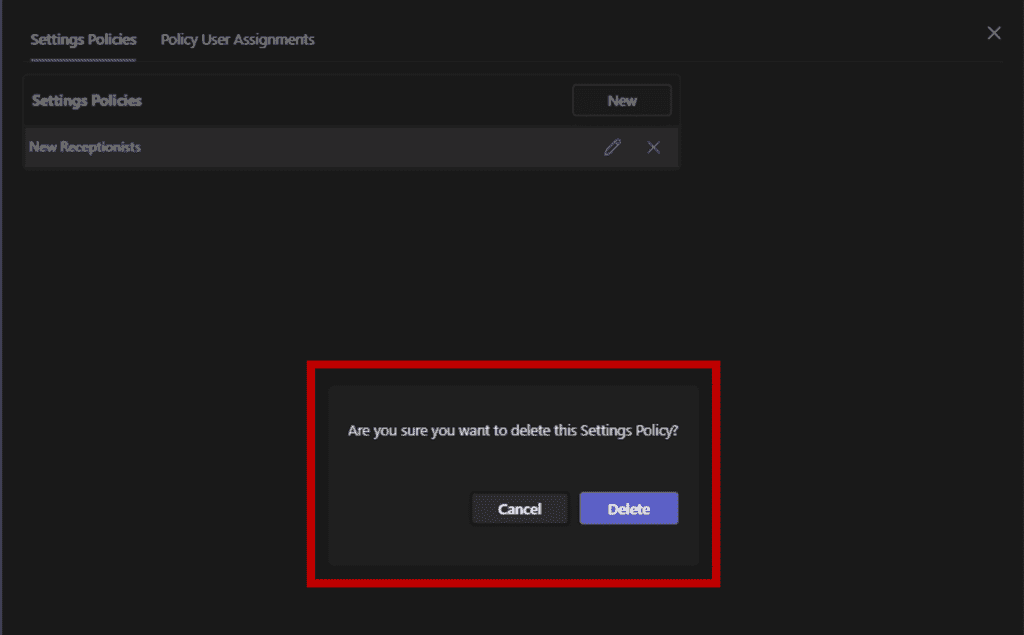
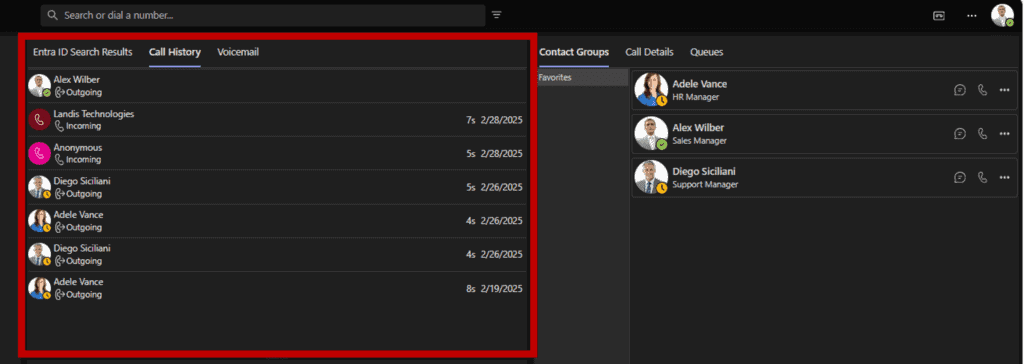
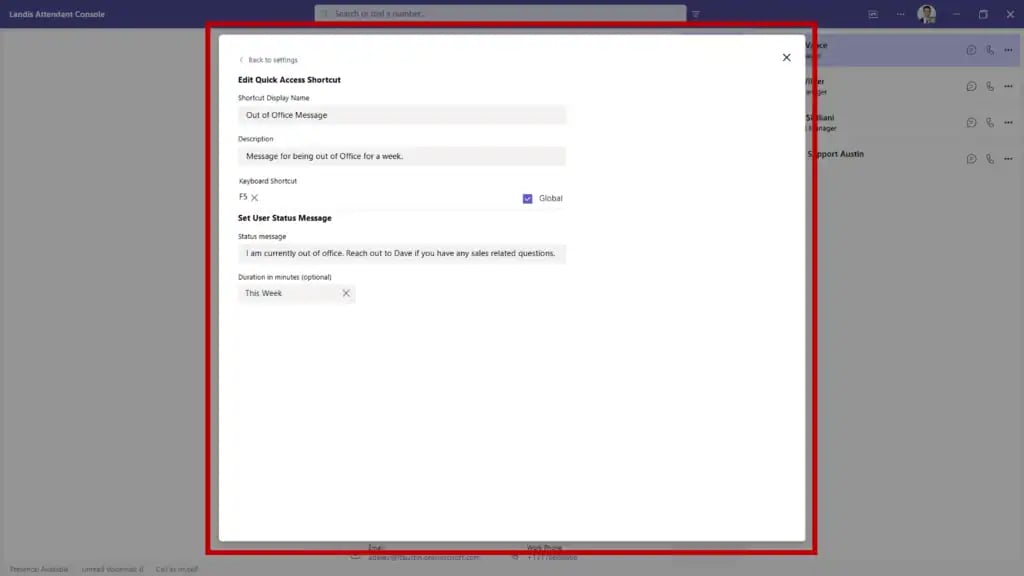
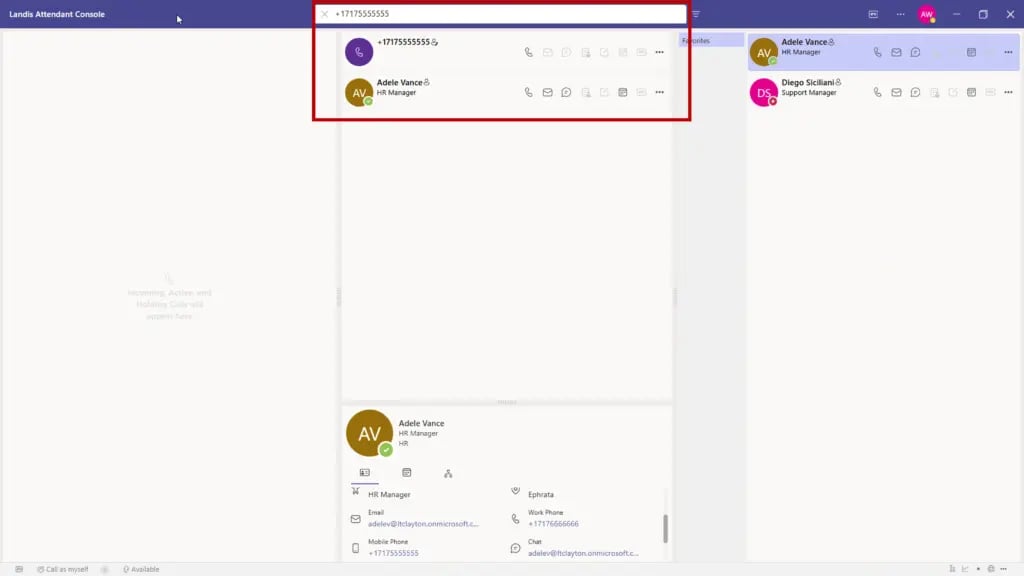
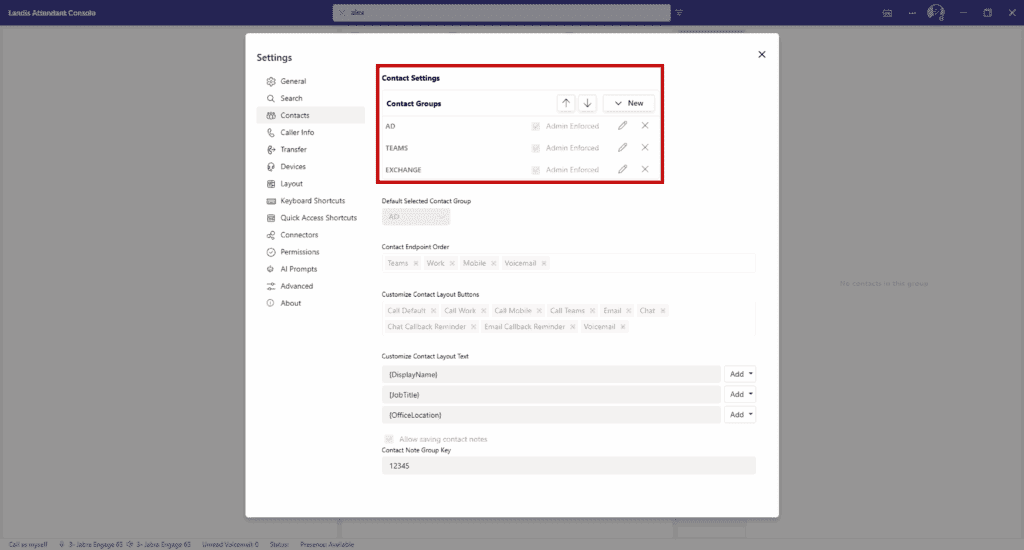
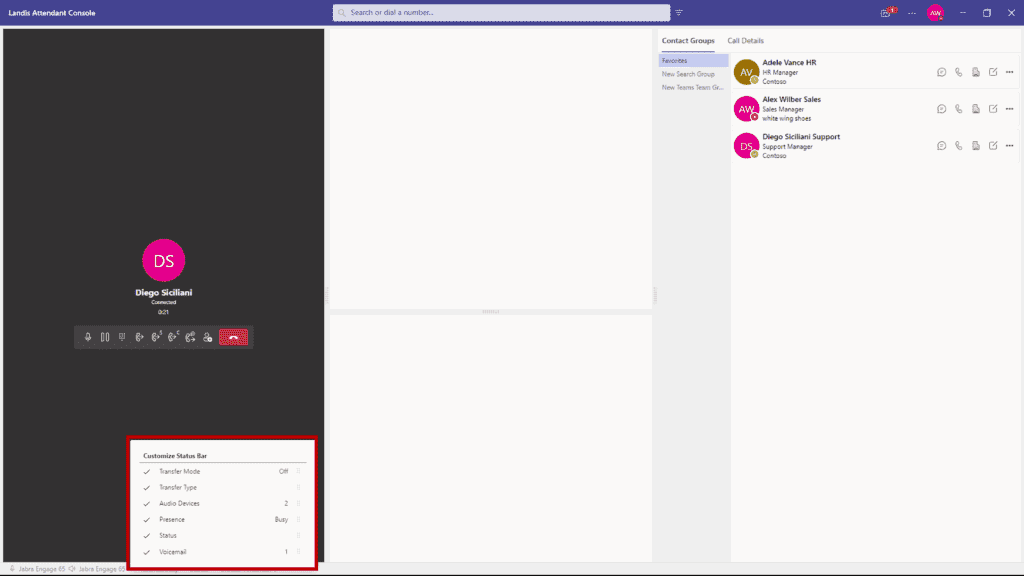
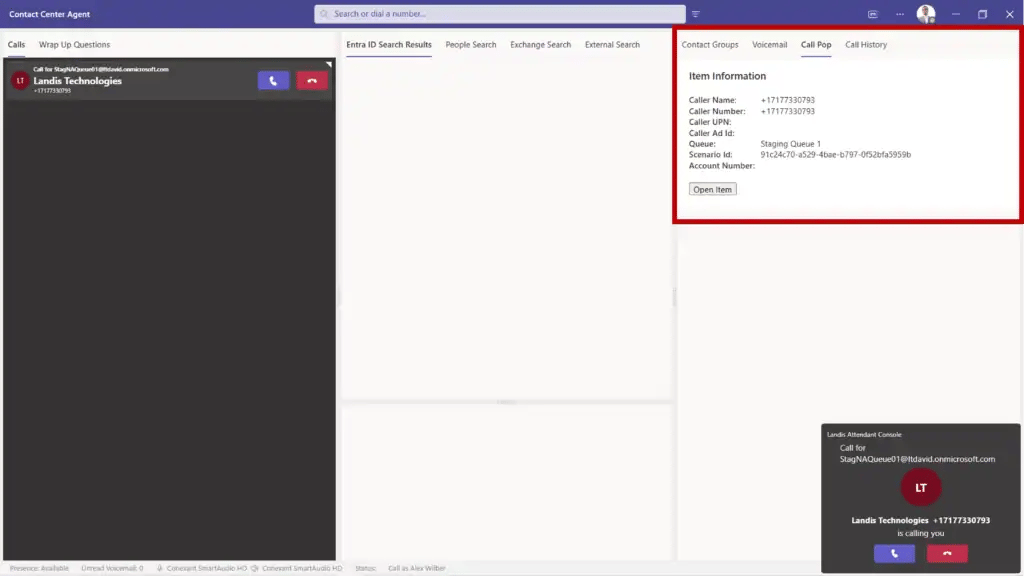
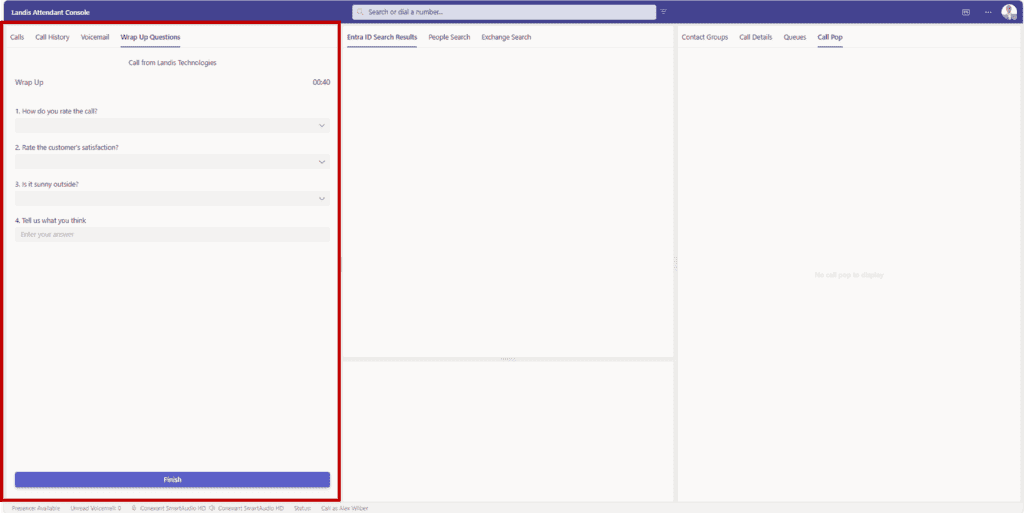
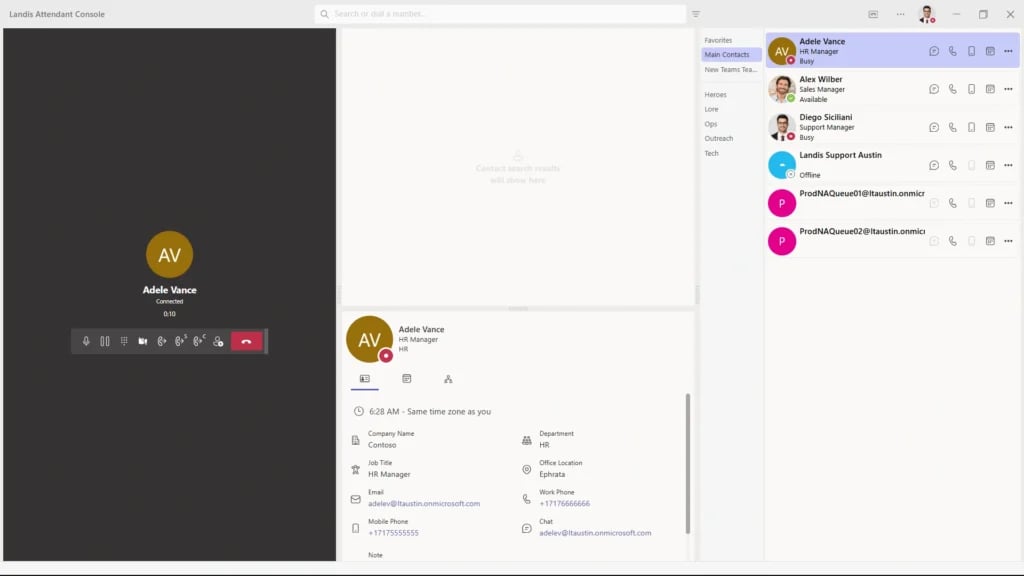
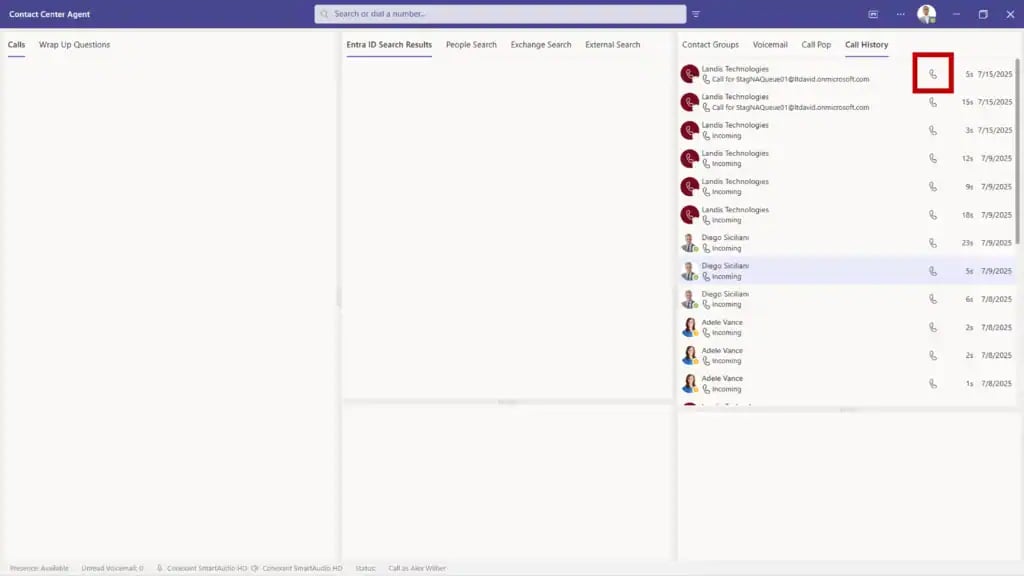
This page is a technical description of new features in Landis Attendant Console for Microsoft Teams.
You can connect with us right now by clicking Talk to Sales.
Roaming Call History
Additional Smart panel
Call Details - Displays when hovering over or selecting far right grey bar on the call controls of both active calls and calls on hold. This also acts as a call selector when call details panel is in the current layout.
Display meeting location in contact details schedule view
Keyboard shortcut for starting or stopping video
UI Improvements
Sync List/Detail splitter position
New Light Theme
Center screen notification
Fix to keep callpop visible until wrapup is complete
Fix to prevent wrapup scrollbar from resetting
Fix issue on contact card hover
Reset selected delegate when switching Landis Contact Center orgs
Setting to automatically start desktop app on login.
Fix PowerApps sign-in issue
Noise Suppression (Browser only)
Teams Queue opt in/out from Teams Call Queues panel
Additional Smart panels: Panels that appear as needed when omitted from the current layout
Voicemail - Voicemail button will display a flyout on the right
When navigating to real time speech to text setting, the previous selection will no longer be reverted
AI transfer advisor no longer returns irrelevant and random search results.
Transfer advisor now works with or without AI Prompts.
Add a few missing translations
Enhanced :
Add Agent Status, Time in Agent Status, and Signed-In Queue Count to footer
Smart panels: Panels that appear as needed when omitted from the current layout.
Queues Panel (opens when clicking on queue properties in footer)
Add missing settings to settings import/export
Contact Details: Hide tabs that don't apply to specific contact types
Fix error that occurred when changing transcription language during a call
Fix quick access shortcut for changing agent status
Allow application sign in for environments that use deep packet inspection
Show Teams People app categories as contact groups. See
Closed Captions supports multiple languages. See
New panel: Microsoft 365 Group Voicemail (Requires additional app permission) See
New quick access shortcut: Change layout. See
Settings UI improvements
Transfer to Voicemail: Automatically switch to blind transfer when transferring to voicemail.
Add missing language translations
Fix issue with duplicate text when using the transcription copy button.
The start chat button will now work correctly in the desktop app when set as the default Windows application to handle SIP links.
: A star (*) indicates transcript from attendant console user.
Ability to initiate outbound calls on behalf of a Teams queue.(Preview) .
New toast notification shown on bottom center to indicate an action (e.g. Quick Access Shortcut presence change) has occurred
: Users can now return calls using the 'call' indicator on each voicemail item.
Fix issue in Advanced Settings, if End of Call Webhook is not enabled, the related settings are disabled.
Translate drop down options on the quick access shortcut for setting a call delegator.
Misc UI improvements
Fix chat consult transfer to voicemail option.
Call Toast now displays a visual loading indicator when a hotkey is used to Answer or Reject an incoming call.
Improve and support multiple custom layouts
: Ability to use an adaptive card
()
Fix missing translations
Miscellaneous UI fixes
Filters now work with new people search ()
Remove the ability to delete list setting even if it was admin enforced
Fix authentication issue when in some scenarios multiple browser tabs were opened
Use static port when possible, during authentication process
Improved call toast UI.
Breaking Change: Landis Contact Center integration (Preview):
The Landis Contact Center integration (Preview) will be updated to use single sign on for an improved sign in experience. Because of this change, the integration will be disabled by default for all users. To re-enable, select Settings | Connectors | Enable Landis Contact Center Integration | select Landis Contact Center organization (if applicable).
(Preview)
Call Pop
Wrap-up Questions Panel
Better sign in experience.
When Add Participant action is initiated on a holding call, the call will now resume and add participant
Fix Call history displaying conference calls incorrectly
Fix issue where failed calls generate blank call history
Fix favorites groups no longer created for new users
Update electron version, which uses newer version of chromium
Local Call History (Preview)
AI Features
New Triggers
End of call: trigger AI request at the end of the call
Fix issue where another PSTN participant could not be added to an existing PSTN call.
Audible alerts now plays over selected device instead of Windows default.
Fix issue were in some cases editing the chat callback reminder was disabled.
Fix issue where in some cases caller name would change to callee name.
Fix issue where in some cases the click to dial (tel:) link was not properly decoded.
Landis Attendant Console Bot application added to Teams app store.
Hold Time Alerts
Configurable warning and critical time.
Audible alert when critical time is reached.
When using keyboard shortcuts to decline, hold, or resume a call, progress indicators will appear to signify action.
If a blank normalization rule is created in settings policies, it will be filtered out on save.
When user submits or deletes a status message, the UI should now update immediately.
Fix status message and out of office message not updating on the contacts in list.
Handle tel: and sip: links from desktop app.
Save the window position and location when closing the application. These settings will be retained when relaunching the application.
Fix issue with files created in temp directory.
Ability to set my Teams status message
Transfer holding call to current call
Contact Groups
Create new contact group from "Add to Contact Group" menu on a contact
Add name of user who started the recording to recording announcement
Improve enabled/disabled states on contact list item, context menu and buttons
Remove experimental feature "enable experimental music on hold" setting.
Fix Issue with layout page scrolling causing hidden items
Fix issue that was in some cases preventing the desktop app from signing in.
Czech
Danish
Dutch
fix some missing translations.
Fix custom layout text box not showing depending on selection.
Fix settings policy user assignments still showing after deleting a settings policy.
Fix music on hold continuing to play with add participant if participant rejects invitation and experimental feature music on hold is enabled.
Ability to when there is an incoming call.
Fix contact groups randomly not appearing when starting application.
Fix chat consult transfer adaptive cards not displaying on Teams mobile.
Fix consult transfer failure when compliance recording is enabled.
Global Exchange Contacts. (Also known as mail contacts or active directory contacts) Requires optional permission.
Search Global Exchange Contacts.
Add Global Exchange Contacts to groups.
Freezing issue when loading profile photos in some scenarios.
Fix issue where in some scenarios pressing enter key twice after entering a search query would not select the first search result.
Fix issue where in some scenarios a holding call in consult transfer mode could not be retrieved.
Full notification suppression support for New Teams client. Custom setting no longer required.
Add support for / hotkey on non-English keyboards.
Chat Consult Transfer Improvements Enable Chat Consult Transfer. See
Reverse Number Lookup for AAD users
Static Webpage Panel. See
Personal Contact Notes. See
Fix silence incoming ring setting also suppressing outbound ring sound
Fix unexpected behavior when removing from contact groups
Improve logging
Safe transfer to PSTN will fall back to blind transfer instead of failing.
Fix zooming error
Fix PowerApps authentication issue in call pop.
(Experimental Feature)
Call Contact quick access shortcut button will now initiate a call to a UPN that contains numbers.
Execute HTTP Request quick access shortcut headers can be added and removed.
Remove the word "at" in the placeholder {callernumber} in callback message.
Transfer to direct to voicemail will no longer post an error message if chat consult transfer bot has been deployed.
Chat consult transfer "sent to voicemail" option
Filter by company name in search sources and contact groups
Filter out disabled accounts in Active Directory search. Enabled by default.
Cursor moves to search field after selecting a transfer mode.
Call back messages are now imported correctly when using the import settings from a file option
Add logging to desktop toast notification
Contact group does not load when user or user(s) have been removed from cache.
Fix: Calls not appearing in the handled calls panel
The sign in button will now open a browser where the user will be prompted to complete the sign in process for the desktop application
Improve Teams notification suppression
Improve call details on desktop notification
Show phone icon when contact is a PSTN contact type.
Fix: VM panel now shows profile photo and presence for AD users
Fix: VM icon displays correctly in light and dark mode
Fix: Call pop info for PSTN calls
Additional caller information shown for the following scenarios:
Transferred by
Forwarded by
Call for
Misc call pop fixes
When user is in DND, calls are now suppressed
Misc caller information fixes
True Consult Transfer
Show caller info for incoming queue calls (conference mode only)
Show trial/license info in About page
Microsoft bug where selected audio device was not being used
Improvements to normalization rules
No longer add default normalization rules for new tenants
Support for ordering contact groups, search tabs, QAS shortcuts & number normalization rules.
Show contact photo on incoming call, current call, call on hold (inbound calls atm)
Contact groups ability to remove contacts from saved groups or UPN groups
Contact details area improvements, (improve layout spacing & flow/vertical/horizontal) clickable links, copy button, larger photo, etc.
If a number normalization rule has a blank expression its now disregarded
Fix inability to type forward slash into settings window input box
Shares same manager now does not show self
Call hold time incorrect when disconnecting call with multiple calls on hold
Improve desktop app memory usage
Better facilitate Teams call toast suppression
Toast alert window now zooms with rest of app
Sometimes shows "already answering a call" notification when it shouldn't
New Teams.ManageChats permission to manage chats in Microsoft Teams: Used for managing chat threads required for some call scenarios
Show desktop app version in About and suggest update if needed.
Fixed when closing the app from the task bar, an unexpected error occurred
Fixed teams suppression enabled when user was not signed into application
Fixed Teams toast suppression not working in some scenarios.
Adds Shares Same Manager to the Organization panel in Contact Details
Fixed outbound PSTN call failure in environments with direct routing and media bypass
Fixed failure when adding PSTN participant to a Teams P2P call
Chat Consult Transfer BOT (Preview)
Transfer type that sends an adaptive card to a Teams user with an choice to Accept or Reject the call. if Accepted the call will automatically transfer to the user with no receptionist action required.
Note: Requires Teams App that may be delivered after release date.
People.Read & Presence.ReadWrite permissions are now mandatory to use Attendant Console
Visual Voicemail panel to show a list of voicemails
If voicemail is from an AD user, the profile photo, presence & information will display
Presence.ReadWrite and People.Read are now required scopes
Improve settings window width to accommodate smaller screens
fixed some translations
Themes now using to match Microsoft Teams
Contact presence now has an icon for at-a-glance indication of "In a Call" (versus "Busy")
User presence allows custom duration when setting presence
New "person" component brings improved contact presentation
Fixes bug that caused an existing call in consult transfer mode to be joined to another incoming call when answered.
Fixes bug where ringer didn't work if Calls panel was not selected (in a panel with multiple tabs)
Fixes bug where schedule in "Contact Details" did not show in some cases.
When a user imports settings, they will be available where ever this user runs Attendant Console
Improve logic to determine if user is a resource account (aka Auto Attendant, Queue or other voice application)
Allow user to change their presence
This is being released as an optional feature so that the permission consent does not disrupt existing users
Sync users' settings: User's settings will get saved to the backend and retrieved by other instances of the app.
Fix issue where dropdowns did not highlight selected item.
Fix issue where same caller id showed on 2 different calls
Fix several settings import/export issues
Call Answer/Hang Up
Call Hold/Off Hold
Dialing Phone Numbers & Teams users
DTMF
Fix scroll bar in footer layout menu
Fix call slowness caused by video
Contact Center Wrap-Up Questions - Automatically displayed as a flyout on the right
Enhanced Landis Contact Center Integration:
Contact Center Outbound Queue Calling
Queue stats on Queues panel
Ability to join or transfer a call from another device to Attendant Console
Video Calling
Add time zone information for Entra users in contact card
Entra reverse number lookup for searches
Mic level indicator on footer and Settings | Devices
Contact card popup when selecting or hovering over most avatars
UI Improvements
Improvements to Contact search results loading animation
In Settings Grids, an icon is displayed in a column if the setting is admin-enforced.
If there are no admin enforced items, this column will not be displayed.
Improvements to inline dropdown behavior, specifically when on a smaller screen.
UI formatting on call transfer icons is improved
Footer visual improvements
Change to icons instead of text.
Items have a fixed length and truncate if longer. A tooltip is displayed when hovering.
Search Results (opens when clicking in Search box)
People Search: Add filters to specify what types of contacts are returned
Quick Access Shortcuts: Change layout buttons now appear on footer
Add Selected Layout to footer menu
You can choose an icon to display in the footer when creating a quick access shortcut for a layout.
Ability to connect to your own Azure AI model
Moved the following settings to the AI Settings Tab:
Enable Real Time Speech to Text
Save Transcription to Local History
Enable AI Transfer Advisor (private preview)
UI Improvements
Update all dropdowns to more closely match Teams
Show icons and description if panels are blank
Queues panel
Move Sign-in toggles to left
Improve appearance when panel is narrow
Fix flicker that appeared when searching for contacts
People search source. See Search
Calendar button on contact layout. This button will open the calendar/schedule tab on contact details panel. See Contacts
Fix accessibility problems for the contact list item
Fix issue where no text was displayed on contacts if the contact layout text was blank.
Accessibility improvements: Better tab navigation
Call History Panel: Each record now displays the time of the call.
Summarize transferred calls: AI call Summary sent in chat to transfer recipient on Call Transfer.
AI suggested transfer assistant (Private preview)
Feature highlights menu
Landis Contact Center Integration
New Quick Access Shortcuts
Change a Landis Contact Center Agent Status.
Sign in or out of a specific Landis Contact Center queue.
Sign in or out of all Landis Contact Center queues.
Keyboard shortcut: Enable or disable Landis Contact Center call recording.
Landis Contact Center call recording status can be shown on footer.
Fix adaptive cards on AI Prompts randomly not saving.
Fix issue when making an outbound call to a Native Teams Queue, the search switched to the agent.
Fix issue where in some cases the AI prompt results were not included in end of call webhook.
Fix issue where intermittently notes for external contacts were not displayed in contact list
Improve caller ID for Teams auto attendant transfer to queue, transfer to agent scenario.
Recording status and control
Add button visibility setting for transfer to current call
Change Teams status message quick access shortcut button
Call History Panel: Add call button
New checkbox in settings > connectors
New optional permission: CallDelegation.ReadWrite
"Call as" dropdown shows under user profile menu
"Call as" Quick Access Shortcut
Now displaying 5 business days for calendar on contact card panel
Settings Policy: "list type" settings can be admin enforced per item instead of the entire list
Add Adaptive Card support to AI Prompts (Preview)
Official support for transfer to Voicemail
Quick access shortcuts: Call user shortcut transfer to voicemail option
Options to display transfer mode, transfer type, audio devices, Teams presence, Teams status message, unread voicemail count, and selected delegator.
People Search (Private Preview): New search source using Graph "/search" API.
Fix app Presence in not working on first load of AC
Fix issue when deleting AI Prompts in settings policy
Fix ability to create contact groups even when admin enforced
UI Improvements
Fix icon/label spacing for notes field
Improve panel margin consistency for call history and voicemail
Hover effect on language dropdown
Quick Access Shortcut panel can now scroll
Landis Call Queues panel can now scroll
Keyboard shortcut: trigger AI request whenever a keyboard shortcut is pressed.
Save an AI response to local call history
Prevent deletion of AI prompts that are in use by callback, etc.
Consult Transfer: Improve UX by adding a "Complete Transfer" button to the current call. This button can be used to complete the consult transfer.
Landis Contact Center Integration:
Settings on the Queues panel now update automatically update. The refresh button has been removed.
Added agent status timer
Delete confirmation added to settings policies
Notes for Exchange and External contacts are able to be shown on the contact card.
This only applies to external notes (saved in Exchange or external provider)
Misc UI Improvements
Failed Transfer Alerts
Configurable warning and critical times.
Audible alert when critical time is reached. Visual alerts must be enabled to play the audio alert.
AI Prompts
Users can create AI Prompts in settings.
During an active call users can select a prompt, and the response will be displayed on the call details panel.
Prompts can also be used as part of chat callback reminder, email callback reminder, and chat consult transfer.
Auto save changes to queues/user status on (Landis Contact Center) queues panel.
Added Help, What's new, and Feedback options on the title bar context menu.
CNAM info now appears for PSTN calls routed through Landis Contact Center queues.
Ability to add users to contact groups from the contact's context menu when using the keyboard.
Fix transfer to current call showing disabled in some scenarios.
Vertically center the 'more actions' button on handled calls.
In some cases, settings tabs that did not apply to settings policies, appeared when creating a settings policy.
Adjusted vertical and horizontal spacing on queue toggles, as well as horizontal spacing on dropdown.
If a contact group has a filter on it, such as department etc., the option to remove contacts from that group is removed.
Fix issue where Queues panel does not load correctly.
From the "Add to Contact Group" menu on a contact, allow Exchange contacts to be added to Exchange contact groups
From the "Add to Contact Group" menu on a contact, allow Global Exchange contacts to be added to Global Exchange contact groups
Improve Notes:
Shared notes
Enable notes to be used in the contact layout
Landis Contact Center Integration:
"Connectors" tab in settings to authenticate
Queue panel
Queue Signin/SignOut and Agent Status
Call Details panel
Caller notes
Closed Captions (Preview)
Settings policies:
Show Entra Id user's names in assignments table
Allow search for user by display name
Setting to allow search to be cleared after call transfer
Accessibility: screen reader will now read all three lines of contact layout.
After deleting a Contact group, the contacts were not removed until the page is refreshed
After switching the language, the selected language checkbox does not switch until the page is refreshed
Notes for PSTN contacts not saving
When attempting to initiate multiple calls during a transfer, multiple calls could be connected.
Chat Consult Transfer failed depending on contact endpoint order setting
In some cases, removing contact from contact group did not function as expected
Remove the ability to save a blank normalization rule
Mobile number in context menu of contact card will not display in certain languages
In some cases work number does not appear in contact context menu.
When navigating into settings menu, some of the settings tabs would disappear.
Fix scrolling issue on contact details panel when contact has status message or OoO message.
Fix progress indicators not working on hold, resume, reject, or hangup buttons.
English
French
German
Hungarian
Icelandic
Italian
Norwegian
Polish
Portuguese
Romanian
Slovenian
Spanish
Swedish
Music on hold is now GA (Experimental feature music on hold should be disabled to utilize the production iteration.)
Ability to silence call waiting tone.
Caller information now shown from calls transferred from a Teams Auto Attendant.
Fix scenario where consult transfer ends up with two connected calls, if retrieve call while it is transferring.
Update consult transfer logic in specific scenario:
Answer first call and put in consult transfer mode. Answer second call and put in consult transfer mode. The first call is now removed from consult transfer mode automatically. Previously, the consult transfer would be performed on the two inbound calls.
Disable transfer mode buttons that aren't supported when connected to a conference call.
Fix scenario where headset buttons do not work as expected.
Fix scenario where selecting a contact button on a contact did not initiate a call depending on endpoint order settings.
fix issue where presence was sometimes changing to available when call is put on hold.
fix issue where displayed theme name does not change when language changes.
Layout is synced across devices and browsers.
Accessibility improvements.
Option to open call pop in browser tab.
Add queue name as an option in call pop URL.
Add call ID as an option in call pop URL.
Add notification banner if call is being recorded by a user.
Allow Focus on Search Bar shortcut key to be customizable.
Add Dutch language.
Add Italian language.
Improved styling on transfer mode icon on holding calls.
Improve language translations.
View and edit for AAD contacts and PSTN search contacts
Searches and contact groups with ' character will now display results correctly.
Call back reminder will now encode the "+" character in the callback deep link.
User status message appears in contact details panel and contact card
Specify max contact search results in contact group
Settings policies
On behalf of
Call from a group
Call from a meeting
Experimental Feature
Transfer to Voicemail. See Experimental Features
Allow PSTN numbers on contacts to be normalized
Show PSTN contact results on all search tabs
Caching improvements
UI: Improve experience for inserting parameters in call pop, custom messages, etc.
UI: Smart separators for parameters
Add a "Download Desktop App" to the header settings menu
App will redirect for Auth if Teams.ManageChats is not consented to
Presence momentarily jumps between Busy and OutOfOffice in Contact Details when a user has an OutOfOffice Message set
Internal localization improvements for date times in schedule area for example
MenuButton on Contact Settings / TextInput doesn't always put the dropdown list at the right place, making some items unavailable
Some button do not default to an auto/content width and it should for localization purposes
Improve keyboard shortcut on desktop app call notification
Better support for different monitor sizes
Better list editing for Search Sources, Contact Groups, Quick Access Shortcuts & Number Normalizations Rules
Some new icons, better organized screens & dropdowns
Visual Voicemail panel enhancements
PC App (Preview) Download
Call toast outside PC app
Global shortcut keys
Suppress Microsoft Teams incoming call toast
Resize user interface with zoom in & out controls
Call Back Reminder definable templates for Chat & Email reminder messages sent
Allows for customizing messages including language specific messages
Various general UI improvements
Smoother active call panel
Work contact method uses Teams icon
Show user photo on active calls panel
Finesse item selection colors
Quick Access Shortcut to change user presence
Additional client activity will be in the troubleshooting log file
Additional service resilience resources
Clicking on a voicemail will mark it as read
Contact Groups now have a splitter/resizer between groups and contacts
all presence indicators more closely follow dark & standard themes
avatar quality
and more
Improved client side logging & export (Settings | Advanced | Logging level )
UI to make it easier to add lists of departments, job titles, office locations & countries to search filter area (Settings | Search | Configure filters items lists )
Escape key clear search input
The app visually indicates when it can't run on unsupported browsers
For new users, a contact group is created named Favorites that is prepopulated with some people relevant to that user. This makes the first run experience better by making it easy for contacts to be added to a group.
Searches, "Contact Groups" & "Contacts" sorted by display name
Ring back sound modified to have a softer sound
Use phone icon for PSTN avatar
Improve avatar in the current calls area
Now saving layout panel sizes (panel splitter positions) locally and exporting them with settings export.
Note: These positions are not synced to the backend.
If "Presence.ReadWrite" is consented to, the app presence ("InACall", "InAConferenceCall", etc.) will be sent directly from the client to Microsoft Graph instead of traversing our backend.
Various UI theme improvements
Switching between multiple tabs will now keep "contact group" & "contact" selected.
Changes made in Search Filter will now be reverted if window is close without applying
Fixes bug where incorrect audio device was showing in footer
Fixes issue where adding a contact to a contact group using the context menu was not saved to the server
Fixes issue where an incoming call window could get stuck.
Fixes issue where the keyboard shortcut for "Decline Incoming Call" did not work.
Initially this feature will work only with user's added after this update.
Change "Mail.ReadBasic" to an optional permission.
Dark Mode finalized.
Add loading indicators to search, contact group & schedule areas.
Blind Transfer
Safe Transfer
Consult Transfer (Basic)
Invite Participant
Contact Details
Calendar
Organization
Details
Email Call Back Reminder
Chat Call Back Reminder
Define Hotkeys
Resizable user interface
1-Click Mobile, Work
Voicemail Indicator
Familiar Teams user interface
Web App
Just sign in with Microsoft Teams user
Contact Search
Azure Active Directory Search
Exchange Contact Search
External Http/REST Object Search
Definable Contact Groups
Static contact groups (select contacts in a group)
Dynamic AAD Groups (a group that is filter of AAD)
Teams Team contact group
Segmented/Filter AAD Search
Overall Layout configurator
Contact Layout configurator
QHD/2K/4K Monitor Support (UI resize, configure)
Echo/Test Call
Call Pop up
Multi-call pop up handling
Quick Access Shortcuts
Call Contact
Web page
Http Request
Audio device change
Mouse/Keyboard/Touch navigation
Music on hold via Gateway only
App presence
Dark mode
Language support
English
French
Spanish
German